Spectra Watermaker Gauge Mount

…Radeen’s gift, a custom mount…

Happy Thanksgiving! We are enjoying the day at Sunset Bay Marina and Anchorage. Again, we have to say that this marina has the best focus on customer service, much more than any place we have ever stayed. The management staff is amazing. This is a dream location and it will be very difficult to leave here!

Today we designed and built a simple aluminum mounting bracket to hold the Spectra pressure gauge and water flow meter next to the feed pump in the sail locker. We used aluminum bar stock and with wrenches, bent the shape needed, then drilled holes and mounted the bracket. It was designed to slope upwards so we can see it from above when looking down into the locker. It worked out well. Into this gauge, the product water is plumbed and it will show the pressure in the feed pump and show the gallons per hour of production. With this information, we can tell the state of the 5 micron filter and if the system is running well. If not, it usually means the filter is getting clogged and needs cleaned or changed. Over all, this system is simple. We are glad to know the design and installation so well. We expect this watermaker to give us many years of production.

Our Thanksgiving table with boat buddies

Our Thanksgiving was a very nice celebration with boat buddies Bill and Trish s/v Island Bound and their buddies Kurt and Sharon of s/v Byrd Ketcher and Matt and Nonnie s/v Sophia Jean and IP owners Nate and Melba s/v Travelin’ Light. Our host, Sunset Bay Marina and Anchorage, provided an amazing meal catered by TooJay’s Restaurant. The cruisers and local boaters brought side dishes and plenty of desserts. The buffet line went across the 30 foot porch and around the corner.

Radeen and Terri at Sunset Bay Marina

Our local friend, Terri, who lives here aboard IP38 Sailbatical, was also our host and she did a great job helping out the Marina staff with all the set up and table centerpieces.  The meal was fantastic and sharing with boat buddies was very fun. This cruising traveling lifestyle is so wonderful and, as every one always says, it is the people that you meet along the way that make it so very interesting and fun.

Happy Thanksgiving to all…..

The catered buffet line in set up mode overlooking the docks

Propane ovens to keep all the food hot

Our custom water gauge mount in the design phase

This is meant to be cut into a panel, we surface mounted it

The water gauge installed next to the feed pump

The overview, which will allow us to see it from above in the cockpit

Off to Thanksgiving at 1500, Radeen made a carrot cake

Matt, the marina dockmaster, setting up the buffet

Radeen on Thanksgiving day 2016

The 30 foot long pot luck table

The catered hot meal afterwards….turkey, stuffing, potatoes, green beans, carrots, gravy, etc

The buffet overlooking the marina

Must have a food photo on Thanksgiving…

The view from our table at sunset

Heading home, our boat is in the mooring field to the right

Our watermaker job has about one or two more days of work and then it will be finished. We need to run the power feed and install a breaker, and run the product water hose into the water tank. That is it. We are very happy with the install, it took us 4-5 days total. Fun fun fun!

Spectra Watermaker Day 3

…High Pressure Pump bolted down…

This is Day 3 of installing our new Spectra Ventura 200t watermaker and we are moving along well. Today we mounted the high pressure pump on the new platform and thru bolted it, making sure this 30 lb object will NOT go flying around when bashing into waves offshore. Once bolted down, we ran and connected the saltwater line from the new thru hull in the galley floor to the feed pump. From there, the saltwater line ran into the high pressure pump and back out to the overboard thru hull. These 3/4″ water hoses were far easier to run than expected. To get back into the galley floor thru hull, we followed the same path as our stern sea water wash down line. That line we never used, so we removed it and that gave us a chase to pull the new hose right behind the old hose as we pulled it out. Lucky for us, it already ran right past the new watermaker thru hull.

New watermaker thru hull and sea strainer in the galley floor.

There we connected the saltwater line to a new sea strainer and our seawater feed was completed. Back in the sail locker, we ran the feed into the 5 micron filter and then into the 60 PSI pressure cylinder and finally into the Clark high pressure pump. Once this seawater goes into the high pressure pump, it is amplified to 800 psig where it is pushed through the reverse osmosis cylinder separating the salts and impurities into a brine discharge and diverting a small amount of fresh, safe water into our 90 gallon water tank.

The product water outflow is rated at 8.3 gallons per hour while drawing only 8-9 amps of 12 volt DC power. If this is so, then we plan to run this system between noon and 1400 hours when we have extra 12 volt solar power and wind power. When the wind is blowing 15+ knots, we always have extra power, so is the reason we bought this system. Spectra is the most efficient watermaker made, hands down. If there is no solar or wind, then we can run our engine and power the watermaker from our 100 amp alternator. Our engine burns about 1/4 of a gallon per hour when charging. So, one quart of diesel will make 8 gallons of water for about 50 cents a gallom. Interesting.

The 3/4″ brine discharges to an existing above water thru hull

Back to the plumbing….The brine must be routed to an overboard discharge. Lucky for us, we had a thru hull that is above the waterline that was used to drain a cockpit ice box. No one uses this as an ice box. We all use this to store cleaning supplies. The good aspect is that this ice box has a drain hose to a thru hull. So, we replaced this 1994 hose with a new hose and a tee allowing us to reconnect the ice box drain. The watermaker brine will discharge out this thru hull and the ice box will still drain if ever needed. Over all, this all worked out well.

The next task will be to run the 1/4″ product water hose from the high pressure pump to the diverter valve for salinity testing and from the diverted valve to our water tank. Once that is finished, we will run the power line (a 6 AWG or 8 AWG) a very short distance (3 feet) from our nearby battery charger/inverter to the feed pump. We will add a breaker and then run to the pump. We understand that the system is very sensitive to voltage drops, so we will have it wired with heavy gauge wire and very short runs. Very soon, we will fire it up and test it out.  (NOTE: Thanks goes out to Tom and Joyce of IP 40 BAREFOOT for the alert on the need for large power feed wires. We are following your advice.)

So, Day 3 of the Spectra Watermaker installation is finished. Here are more photos…..

The feed pump bolted to the cockpit ice box.
Notice the 5 micron filter and pressure tank on the back of ice box.

This is up high, out of the way in what was all wasted space, We lost zero storage
on this installation. It is the perfect place to mount this gear on an IP35.

We added a dedicated thru hull in the galley floor aft of the engine intake.

Looking up under the cockpit seat ice box to see the drain on the left.
We replaced this 1994 drain hose and added a tee for the brine.

This is an overview photo, looking forward, with the ice box drain on top left.
The existing thru hull is at the bottom righ,t with the new tee cut in.

The brine will flow directly down this hose and overboard via the original thru hull fitting,
which is just above the waterline in the boot stripe.

The sea water feed is on the bottom and the brine discharge is on the top of the Clark pump.
Amazingly, this reverse osmosis pump has no power connected to it, working solely on hydraulics.

The sea water feed pump (black) on the left, plumbed to the 5 micron filter (also black) around the corner on the right.

There it is, the Spectra plumbed in and ready for product water hoses.
Note: the copper strips are part of the grounding system for our Single Side Band Radio.

Off to Flanigan’s for a fun happy hour with Bill and Trisha, IP40/Island Bound and their team, Sophia Jean and Byrd Ketcher.

Again, this Spectra Watermaker install is still a difficulty level of a 2 out of 10. It is really simple. The hardest part is planning the placement of the parts and then making a secure platform to bolt the machine down. Though a pain in the neck, the plumbing is simple because it is just hose runs. We hope to have this finished in one or two more days. That is exciting considering we are doing this all on a mooring ball in Stuart Florida. It can be done….Thank you for following along. Happy Thanksgiving to all!

Spectra Watermaker Install Day 1 Day 2

…Spectra Ventura 200t…

Now that our new B&G gear is all installed and running, it is time to focus on the new Spectra Ventura 200t watermaker installation. We are on a mooring ball in Stuart, Florida. That makes it a bit more challenging but we are pushing hard to get this new gear installed so we can test it and shake it all down. Stuart has turned out to a new dream location for us. We LOVE IT HERE! We are working with Mack Sails Company who is supporting our efforts as we work through our own refit #3 program. Thank you again goes out to Colin Mack who has been the best person to work. We ordered all this new gear through him and leaned on him and his team for all the help and support we needed. What a fantastic company. If you need anything…sails, electronics, chain plates, tanks, etc, you need to run it by Mack Sails first. Colin and Travis Mack will serve you well.

The feed pump up high on the side of the cockpit cooler box


On Day One of this Spectra Watermaker Challenge, we installed the feed pump and the product water diverter valve and we prebuilt all the plumbing parts. Day Two we installed the Clark pump platform over our B&G autopilot ram. This shelf needs to hold the 30 lb pump and pressure cylinders while bashing into  serious ocean waves. We think we designed and built a very solid platform. I pre-built the pieces while still at home and final cut everything onboard using my Dremel tool with a saw blade. I must say, having a Dremel with all the blades is a good idea on a boat. All I had to do was fit them into place and then epoxy the battens onto the bulkhead and the fiberglass stern. Next, I mounted the custom fit 14″ x 24″ 3/4″ plywood platform. I used JB Weld and 5200 adhesive and screws to assemble the platform. It worked out well. At the end of Day Two, we have the platform installed and painted, top and bottom. and the watermaker will be bolted in tomorrow. 

Overall this watermaker install is a difficulty level of a 2 out of 10 as Spectra has made it their mission to design this for owner installation. It is very, very straightforward. We are glad we are doing this ourselves again, because this way, we will really know the system. It is very important to us that we know every wire, every system, every hose, and how all systems work on our boat. That way, when we are remote, we can usually fix items if we have a break down or if a system is not working correctly. We like this about our Team Island Spirit program, it has worked well for us over the past 15 years!
Here are some photos of Day 1 and 2 of the Spectra Watermaker Challenge. 
This is the entire system being loaded into the dinghy.
One bag of hoses. one bag of parts and one 20″ pressure cylinder.
This is an 8.3 gallons per hour watermaker that uses only 8-9 amps 12 volt!

Radeen reading up on how to install this watermaker.

We took a wonderful Sunday morning off and visited good friend Jim Austin
of sv/Salty Paws in Vero Beach, FL. Jim is my photography mentor.
See. http://www.jimages.com/ 

My photo of mentor Jim getting an interesting shot of the flag on Memorial Island at Riverside Park.
We also took pictures of the antique bells and wagon wheels at the historic Driftwood Inn.
http://www.jimages.com/

Back on Team Island Spirit, with the sun setting beautifully.

We love the curves of Island Spirit, nearly perfect.

Day One, we drilled into the cockpit “ice box” to see where we would end up.
Guess what? It is 4″ thick with foam. We eventually drilled through.

Hayden inside the sail locker on his back drilling holes overhead.
(Jeff Gabor, where are you??)

Next we started to assemble the parts and the fittings.
This is just standard plumbing, nothing mysterious.

Radeen in her Black and White Spectra outfit, what a great helper.

Day 2 returning from Home Dept with plywood and parts.

It takes more time to gather the parts than it does to do the job.

Day 2 began with a plan for the platform over the pilot ram.

We used a carbide scraper to remove the latex paint, then sanded and roughed up the surface.
I curfed battens in the back to make them curve to the shape of the hull and the inside of the sail locker.

The platform with one support leg glued and screwed in place.

The painted platform, we painted the bottom and leg before installing.

After living in the sail locker all day, I finally used 5200 adhesive and then screwed the platform in place.

The finished watermaker platform on the aft wall of the sail locker. This was Jay Aker’s idea from sv/MINX.

With the platform built, installed and painted, we are ready to install the watermaker tomorrow and then pull the plumbing hoses and connect to the new thru hull in the galley floor. We also need to run heavy 10 AWG wire from the battery bank to this unit for power. If all goes well, this should be completed by the end of the week. Thank you for following along, we love to hear from you…..

B&G Zeus2 Completed

…the new B&G Zeus2 sailing screen…

After two days of working with the wonderful B&G tech support team, we have solved all our new network install challenges. The solutions were all simple and were a result of missed wires or disconnected wires during the clean up. Now, we have a fully running B&G Zeus2 Multi-function Display MDF and an NAC-3 autopilot computer, GPS, rudder reference, compass 9, DST, 4G radar and 508 wind anemometer with two Triton2 displays, one in the cockpit and one at the nav desk.

The NAC-3 Autopilot computer

This has gone more smoothly than first expected, but then again, we just jumped in and did it! We ripped out all our old gear on Nov 1, then pulled out all the old wires, and on Nov 2 or Nov 3 we started this install. Here we are on Nov 18 and everything is installed and running. All that is needed now is to configure the autopilot on a sea trial. Radeen and I are very proud and excited to have done 99% of the work ourselves while on a mooring ball. Imagine that!

Notice the plug was pulled out and was pushed over the board

So, what actually went wrong? This gear was just released on Oct 27. It is so new, in fact, the B&G staff does not have an NAC-3 pilot installed at the tech support center, so we are on our own out here testing, documenting and learning along with the consistently polite and helpful B&G staff. It is exciting, but also makes it even more challenging and we need to try to solve our own problems. In doing so, we jump back in and look at our installs, we get out the 50+ page installation manuals and re-read them for a ninety-ninth time. Yes, there are errors because they are new, version 1.0. Then we call tech support and they tell us that they are not sure, but go check all your connections and wires. While doing this in the sail locker, we discovered that the NMEA 2000 drop cable from the NAC-3 autopilot was pulled out of the circuit board. WHAT? How could this happen? Well it happened because B&G has no wire clamp or other fitting to keep the plug in the circuit board. So, if you happen to pull on this wire, it unplugs from inside the box (while still looking fine on the outside) Then the NAC-3 pilot is offline and cannot be found on the network. There it is, simply a wiring issue. It took a several phone calls and installing new updated software and rebooting until we found this easy wiring issue. Once it was solved, the gear configured itself and found the autopilot computer. Perfect!

Navico provides a 6 foot ethernet wire with their own end fittings.
I need this to be 50+ feet to reach the helm.

Now, the final wire to run is a new ethernet wire from the base of the mast to the helm. WHAT? WHY? We thought we were finished! We were told we needed only one special Simrad/Simnet $50 1 foot long drop cable from the radar interface box into the NMEA 2000 backbone. So we ordered this, waited a day, it came in, we plugged it in and then, foolishly, I spent lots of time making connections at the base of the mast look really nice. I secured all the wires and screwed all the wire ties down and made sure nothing will move when bashing into waves offshore. And then, it did not work. That is when we learned that we ALSO need Navico’s proprietary ethernet wire that will run from the mast to the helm Zeus2 display. WHAT? This did not show in the manual! It showed that we could connect it to the NMEA 2000 bus and it would feed to the helm. NO, that will not work, we need the special Navico Ethernet wire. It is part # blah blah blah and it is 50 feet long and it costs $110. Errrrrrrrrrr. Well, I am a Microsoft MCSE Certified Systems Engineer. I have run a lot of ethernet. I will make my own. I must use their proprietary end fittings, but for the 50 feet between the two, I will splice on cat 6 ethernet wire.  So THAT is the last wire I need to run. When that is added, then we will have radar control at the helm on the Zeus2. I can now write my own support manual on how to set up all this gear. Maybe I will!

Here are some photos:

While I worked on the network, Radeen did laundry. Thank you!

Look what I found behind the door, a disconnected NMEA 2000 plug!

The fix, plug it make in and add a wire tie at the bottom to prevent pulling this out ever again.

There it is, the NAC-3 Autopilot displayed on the Zeus2 9 inch screen at the helm,

Dockside configuration complete. The rudder reference needs to know where the stops are.

Notice the rudder reference at the top right.

We finally enjoyed a sunset and a bottle of wine tonite.

Life is good on a cruising sailboat!
We had a great dinner and a nice break from boat work with Drew and Deb of IP380 Shawnee
before they headed home to New England for the holidays.
Sadly, we have no photo of our delightful lunch with John and Honey, the original owners of our IP27, Cinnamon. We have been Spring Cove, Rock Hall, MD, friends since 1991!
It was fun getting to know Mo and George of IP35 Passages
before they also left to go home to New England for the holidays.
(Jim and Laurie of IP350 Kismet were only a few miles away,
but the wind was blowing and so they kept going!)

We are now winding down this B&G network install after 18 days. Today we picked up our Spectra Ventura 200 watermaker. It is time to start that project next. We also received our boom back from Mack Sails with new sheaves for an upgraded reefing design. Radeen and I reinstalled the boom tonight before just sunset. Island Spirit refit #3 is progressing very well. Thank you for following along and thank you for the emails and comments. We do hear from many of you and that is very fun.

New NavPod and B&G Zeus9

…Our NEw NavPod install….

Today, we installed our new NavPod at the helm and cut in the new Autopilot control head. We also added new USB ports and a 12 volt port along with a new LED cockpit light for the dinner table. All of this design is similar to the old NavPod we removed last week, so we did not have to reinvent the ideas, all we had to do was execute the design. This new NavPod came in with the cutout already there for the Zeus2-9.” We needed to cut in the new autoheld controller and mount the RAM mic.

12 Volt to port…USB to stb, bottom of NavPod

The new USB ports are by Blue Seas and the new LED light is bright and made by West Marine. Over all we are thrilled with the new gear and the install. The last task on this electronics refit is to run 12 volt power feed to mast base from the radar switch and to also connect the 12 volt to the Zeus9. Once we do that, the entire new B&G electronics upgrade will be completed. All that will be left is to commission the pilot and test out the compass and rudder references.

In one week we installed this B&G gear….

  • GPS antenna to support network
  • Compass 9 for autopilot
  • Rudder reference connected to the 8″ rudder arm and NAC-3
  • ACP-3 Autopilot computer
  • Triton2 in the cockpit for crew
  • Triton2 at the Nav Desk below decks
  • 4G Radar on the mast at the spreader
  • 508 Wind anemometer atop the mast
  • Zeus2 9″ chartplotter screen at the helm
  • Autopilot controller at the helm
  • New 2″ Thru Hull 
  • New DST 800 depth, speed, temp sensor
  • New NavPod
  • Ran all new NMEA 2000 backbone and tees
ALSO…
  • Removed all old electronics and sold it all on ebay, gone!
  • Pulled out all wires for old electronics
  • New LED steaming light
  • New LED running lights, stern light and mast head
  • New Standard Horizon GPS Explorer VHF with RAM mic
  • Replaced the AIS MillTech Camino radio
Set up boat to live on….
  • Installed all the canvas, sails and enclosure
  • Provisioned, launched and moved to Sunset Bay Marina
It has been a fun busy week, here are the photos of the Nav Pod install…
The navPod as it shipped

12 volt and USB and LED gear to be added

Mounted and wired up with the 12v plug, USB plug and Ram Mic

Layout work

First drill the corner holes

Next cut the area with a Dremel tool

Happy Hayden, we are doing this

Use the Dremel to sand the edges

Screw down the gear using the galley as the workshop

There it is, the back of the chartplotter and the autohelm controller

This equipment is wired into the NMEA 2000 backbone via tees

Bolt it down

USB to starboard on the bottom

LED light for the table at night

12 volt to port

The workshop! Now, clean this up so we can make dinner, which we did!

The new LED light at night, looks great
Thank you all for following along. We are having 500+ visitors a day to this blog. It is great to see the interest once again. Thank you.

IP35 Boom Refit to Single Line Reefing

…Radeen taking the boom to shore…

We have been dealing with the Island Packet internal boom shuttle cars for over 15 years. Guess what? They really do not work well. Just ask any two digit IP owner and they will tell you that they have a terrible time with the reefing system. Well enough is enough with this system. We have decided to remove this poorly designed system and replace it with the standard and simple single line reefing system like on most yachts. You see, the designer of IPs, Bob Johnson, never really went cruising and he never even spent a few weeks out on anchor living on his yachts,

The boom shuttle cars

He also never went sailing on them out in the ocean in 20-25+ knots making a passage to the Bahamas and then try his own reefing system. If he would have, then Island Packet yachts would even be far better then they are . But, since the designer was not an ocean sailor, we the IP owners need to make these yachts better based on our own sailing and cruising experiences, and that is what we are doing. This project we are calling “shuttle cars be gone” because inside the Island Packet boom there are two shuttle car blocks with pulleys. These shuttle cars are there to provide a purchasing power to the reefing system. Well guess what? They jam up, they twist, they knot up, they do not run freely, so we will toss them overboard and give up on living with Bob’s system.

A simple single line reefing sketch

Our solution is to run traditional single line reefing system where the reefing line starts in the cockpit, runs to the mast base, then turns up to the sail reefing point, then down into the boom around the pulley heading back to the end of the boom where it exits and goes up to the aft reef point and then down to the boom where it ties off. Notice, there is no block or shuttle car inside the boom, nothing but a straight line from front to back. To reef, we will simply lower the halyard to a market point just a bit lower than the reef, we will then take up the reef line on a winch making it tight, and then we will raise the halyard and be reefed. To take out a reef we will simply toss off the reef line and raise the sail. No need for a crew member to go onto the deck and pull like a wild man on the “Bob” reefing lines that are jammed up inside the boom. Simply raise the halyard and shake out the reef. Simple!

We really did drive it to Mack Sails

Thanks to Mack Sails, we took off the boom on the mooring ball and took it to shore via the dinghy. Then like crazy sailors, we drove this 14 foot boom to Mack Sails via our car with it hanging out the trunk about 5 feet. It was a crazy idea, but we “got er done!” Tomorrow Mack Sails will deliver the boom back at 8am and we will reinstall the boom. New sheaves will be installed, plus the casting needed to be drilled out and the sheaves needed to be thru bolted so they will not lift UP when reefing. The shuttle car system pulls down but the single line reefing will pull up. So, project  shuttle cars be gone will be a simplified reefing system. We think this will work very well. We will find out soon.

Here are some photos of today….

The IP 35 Gooseneck, a solid design

These front sheaves need thru bolted

Taking apart the gooseneck, we lifted the boom with a halyard

The Island Packet 35 boom is a NB32 casting

These front sheaves will be thru bolted allowing us to pull UP on them

Look at the size of the gooseneck pin!
Nice shape for 33,000 nautical miles

Radeen with the boom on deck, she is such a great helper

Boom be gone, this may work when we take off the mast for the French Canals?

Radeen and the 14 foot boom in the dinghy heading to shore

Yup, it fits onto the car, really????

We had to stop off and mail out our B&G grear via US Post

YAHOO….our new NavPod arrives and it fits

Our boat is starting to look like home as we keep working on it

We are loving Stuart Florida, we just booked into here for a month, why not?

Our new home as we work on the refit with Mack Sails

Radeen is making great meals: Kale salad and chicken
The fire pit at the clubhouse, what a great place

So, our refit is going well, we are soon turning the corner hopefully tomorrow as we will reinstall the boom and then focus on the NavPod at the helm. There we will install the new Zeus2 and the Autopilot control plus the new Ram Mic. Once that is installed, the electronics upgrade is complete. Exciting times, thank you for following along, we enjoy all your comments and emails.

Sunset Bay Mooring Ball Refit

…the Apex Marine Dock we worked off of….

We last were in Apex Marine, Stuart Florida where Mack Sails installed our new 4G B&G Radar antenna and our new digital anemometer on top of the mast. After a day there, we moved around the corner to Sunset Bay Marina where we secured a mooring ball to continue our refit #3 work. This is a great location and Stuart Florida in Martin County could become one of our new favorite locations along the USA East Coast. The town is great, the county has manged it well in respect to development and planning and there are many services here.

We installed new Mack Sails while here, beautiful

The main reason we are here is the Mack Sails company. www.MackSails.com, Colin Mack has been our connection along with his brother, Travis, both of whom run a fantastic business. They are fully on top of their customer service and support. We have worked with many yacht service companies and Mack Sails is currently one of the top by far. We have a lot more work to complete and are really thrilled to be working with this team. Mack Sails is THE place for any of your boat’s needs.

One of the seminars we attended
The French Canals and Waterways!

While here, we decided to take a break from working on the boat and drive up to Melbourne for the SSCA.org GAM. It was really fun to meet some amazing world sailors and Caribbean sailors. We had lunch with several people who have spent many years in the western Caribbean, our current goal. What a wonderful event with seminars, lunch gatherings, and exhibitor displays. Radeen and I really enjoyed attending for two of the four days. If you are ever in Melbourne FL in the beginning of Nov, then this is a must attend event.

Triton2 the new B&G gear is powered up

After two days at the GAM, Fri and Sat, we drove back to the boat to get back to work on the refit. The first challenge was to finish the NMEA 2000 backbone wiring with the mast work and the radar and wind sensor. Then we needed to add a 12 volt power tap into the electrical connections so that when we turn on the “Instruments” switch, our new B&G electronics will be powered up. We removed the old wiring and then installed the new wiring and on Sunday morning we flipped the switch and there it was….a NEW B&G Triton2 display up and running. WOW, what a great piece of programming and software. The new Triton2 configured itself and found all the other new equipment plugged into the network. All I had to do was press enter, enter, enter and watch it fire up. We are able to click through 15 various screens of data all coming from the many sensors installed on the boat. WOW, what great gear. So far, we are delighted with the appearance of the display and the ease of use.

Our next task is to install the new NavPod at the helm, as soon as it is delivered, and then plug into the backbone a new Zeus2, a pilot controller, and another Triton2 display right at the helm. All the wiring has been run and all we need to do is to cut holes into the NavPod for the displays and then plug them into the backbone.  Our old VHF will be replaced with a new Standard Explorer integrated GPS VHF with a RAM mic. Once again, our ram mic is old, the wires are frayed and worn, so we want to make sure we have a very dependable VHF. That will be the final install. Then we will need to commission the new pilot and the new compass, but that is relatively easy. So, one week into the new install and we are nearly finished. This has gone far better than expected. B&G Triton2 gear is amazing!

Here are more photos.

This is the APEX Marine work dock. We are to the left of the large blue boat.

Our 180 degree view from our mooring ball in the front row at Sunset Bay Marina. Dinghy dock to the right.
Island Spirit on the mooring ball

We took a quick 1hr drive with Terri of IP38 Sailbatical to visit Blaine Parks when he sailed into Vero.
He was on a delivery with a new crew member, Al.

The JAM session at the SSCA GAM, always fun to hear these guys
Radeen and Hayden with their bags as we depart the hotel room

We scored some great cruising guides given out by Colombia and Panama!

Our dear friend, Bob Wiley, IP380 Judith III, is always here for us when we sail or drive into Florida.
We also enjoyed visiting with Terri of IP38 Sailbatical, Ceal, former IP owner, Dick and Carol of IP44 Gusto and their amazing single handed sailing friends, Ann, Judy and Arlene. Finally, we enjoyed an excellent presentation by Bill and Amy of IP38 Estralita about sailing in Southeast Asia during their circumnavigation. What a great time!

We bought some cruising guides to the Western Caribbean as well.

Back onboard, we hooked up the Radar interface into the backbone

We removed old wiring and ran some new wiring

There it is, the new B&G Triton2 powered up and working

Walking around the town of Stuart, FL, a great location to live

Typical town condos

We are the sailboat to the right

Every night the marina has a fire pit to gather around, very nice

The SUPER MOON rises off our stern in beautiful weather.

 Tomorrow, Monday, we will remove our boom and take it to Mack Sails where it will be modified for a simple single line reefing system. We will be removing the shuttle cars in the boom as they are a bad design and always bind up. Bye bye to them. Refit #3 moving along.

On Anchor off Apex Marine

…anchored out, our first night…

Immediately after we launched yesterday, we had to drive out of the Hinckley Marina because they had no slip for us. This was really unusual, but we are fine with it. We drove the boat about 8 miles around the town of Stuart Florida and dropped the anchor off Apex Marine. This is one of the marina yards where Mack Sails works on yachts. So we decided to drop anchor off the marina and deal with stowing and organizing all the stuff onboard. We have no dinghy running, we have no car here yet, we are out in the middle of the creek and you know what…..that is just fine with us.

I made a quick LED anchor light as ours was burned out

We are monitoring the presidential election on our 32″ Samsung HDTV with digital antenna. We receive 40 digital stations, of course, most are junk, but we get ABC, NBC, CBS, Fox, PBS. We are living off solar and wind power, with no need to run the engine for power because the wind is blowing 15-20 and it is also sunny, so we have lots of power. It is a simple peaceful day with lots going on and with no where to go and no way to get there anyway. Imagine that.

Lifting the dinghy off the deck with the jib halyard

Today we needed to rerun the halyards, jib, main, staysail, and spare. These were all pulled down in May and run with cheap chase lines, allowing us to pull them back up now. The reason you take down your halyards is to protect them from UV damage and also to reduce a little windage for storms. With the halyards now rerun, we used the jib halyard to lift the 120 lb 10 ft dinghy off the deck and over the side. This is our transportation and we need to get it back in service. It is our car, our ride to shore, the grocery store, the cocktail parties, it is the way we all get around out here. So, we lifted it off the deck and pushed her over the side and lowered her into the water. BUNS II, as we call her, was happy to be splashed as well. She is a fun expedition explorer vehicle and we love taking her to the beaches and the reefs. Fun times ahead for sure!

A new bubbly to try. We like Gruet from New Mesico or Moet & Chandon from France.
This is reported to be similar.
We will see if this new bubbly is any good

This is an AB 10VL dinghy. It is 120 lbs 10 feet long.
It fits on the foredeck of an IP35 fully inflated.

We added padding with life jackets on top of the forward hatch.
The dinghy seat rests on this spot, so it is perfect.

Radeen assisted as we lowered  BUNS II into the water.

There we go, the foredeck is clear. Now we can see forward and we can work on the mast.

Buns II in the davits with new “trucker straps” 

.
Radeen designed new bed quilt comforters for the v-berth bunk and the aft quarter berth bunk and I did the sewing on our Sailrite sewing machine. They are much lighter in weight, since we are going to warmer climates. Now, she is in search of new rugs.

V-berth as arranged by Radeen

V-berth as arranged by Hayden

Why is it so much fun just messing around with a boat? Why? I am not really sure, but it is. We are out here on anchor with no real easy way to get off this boat and we are loving it. We have power, internet, TV, food, water, wine and best of all CHAMPAGNE which gets popped tonight. Year #6 is off to a great beginning. Thanks for sharing this with us. It means so much knowing our friends and family are along.

Launch Day We are IN the Water

…Island Spirit heads for the water…

It has been 12 days of living out of the car, hotel rooms and a time share condo. Today the Hinckley Yard launched our boat! These transitions from land to water are always exciting and always full of action. This launch was most unusual because once we hit the water, there was no place for us to go, no dock for us to move into, as all were full. That meant we had to have the boat ready to live on right away at anchor.

Radeen sending bags up to the Deck

This meant hauling all our bags, food, propane, dinghy gas, and various items up from the car, up the 8 foot stern ladder and onto the deck! Some of this loading we did using ropes. Radeen would tie the lifting canvas bags to the rope I tossed down to her and then I would pull it up to the deck, We have never had to do this before! Imagine, all your food, clothes and travel gear is in your car, on the ground. The boat deck in a parking lot is 8 feet off the ground. Now, move everything onboard! WHAT? You see, normally you launch a boat and then move it into a slip and then pull your car nearby and load it all into a dock cart and you wheelbarrow it down to dock and walk it onto the boat. Not this time! One minute after the boat was launched, we boarded the bow in the haul out slip, started the engine, backed out, spun around and drove off. We ran 8 miles west, around the town of Stuart, and dropped the anchor in the North Fork of the St. Lucie River. We watched the sunset, had a great dinner onboard and we should sleep well tonight!

Living out of the car for 12 days, a challenge


Tomorrow, we need to get the dinghy off the deck, add the 15hp outboard, add the 6 gallon fuel tank and fire it up so we can get back to shore. That will be Tue. Then Wed we move to the service dock at Apex Marine where Mack Sails will be working on our mast, installing the new 4G digital radar antenna and new B&G anemometer. We hope to have this electronics package up and running soon for testing. But first, let’s make this boat livable….

Hear are some photos.

Getting propane, we need coffee in the AM

Here is the process of how a boat is launched.
(That is, a boat that cannot be towed with a car or truck)
This service is included with the storage fee.

The travel lift arrives, notice it is U shaped at the top.

The travel lift backs over and around the boat

The lift operators run lifting straps under the boat
These slings are then pinned together with a very large bar

The lifting straps are tightened and then pick up the boat

Once lifted, the jack stands are removed

The left over bottom paint is used to touch up where the boat was resting on blocks

The travel lift operator drives the lift with the boat to the water

They keep the boat only a foot off the ground
so if the hydraulics fail then it does not fall too far, but damage would still be bad
This boat weighs in at about 18,000 lbs

Radeen looks back as Island Spirit slowly heads to the water

There she is, hanging over the water, and then will be lowered down
We climbed on over the bow

YEAR #6 Selfie, we love this cruising life and cannot believe it has been 5 years!

Our first sunset at anchor, cool and breezy….perfect!

Sunset off the stern of Island Spirit on anchor, Stuart, Florida

Our first job in the morning will be to get the dinghy off the deck and rigged and running. Then we will have transportation to get to shore. Wednesday, our new 4G radar will be installed. Exciting times, Refit #3. Thank you for sailing along.

Final Prep Before Launch

… a frog visits Island Spirit…

Our final prep for launch is wrapped up and, as every boater knows, you are never ready and you are never finished working on the boat. Maybe that is what makes boating so interesting, you always have something to work on, something to fix, something to shop for, something to solve, something to design, on and on and on it goes. Bottom line, you need to set a schedule, set dates and simply move on. If you do not, you will never get out of this “working on the boat” endless loop. We did move our launch date back from Wed to Friday, then to Monday and now we are going, no more delay. Island Spirit is meant to be in the water, she loves to sail, and she loves to keep us safe. She is a wonderful boat and we really put our life in her hands and we trust her. We also know her very well. Our good luck frog was found in the cockpit under a life jacket while we were putting things away in the sail locker. This beautiful frog was rescued and moved off the boat and onto the lawn where it happily hopped away.

Below decks getting better

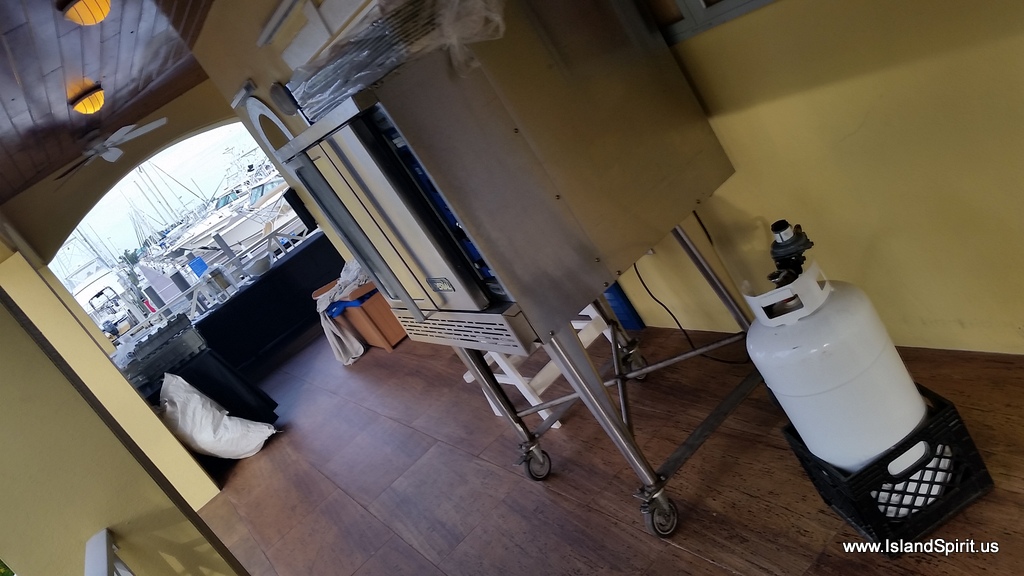
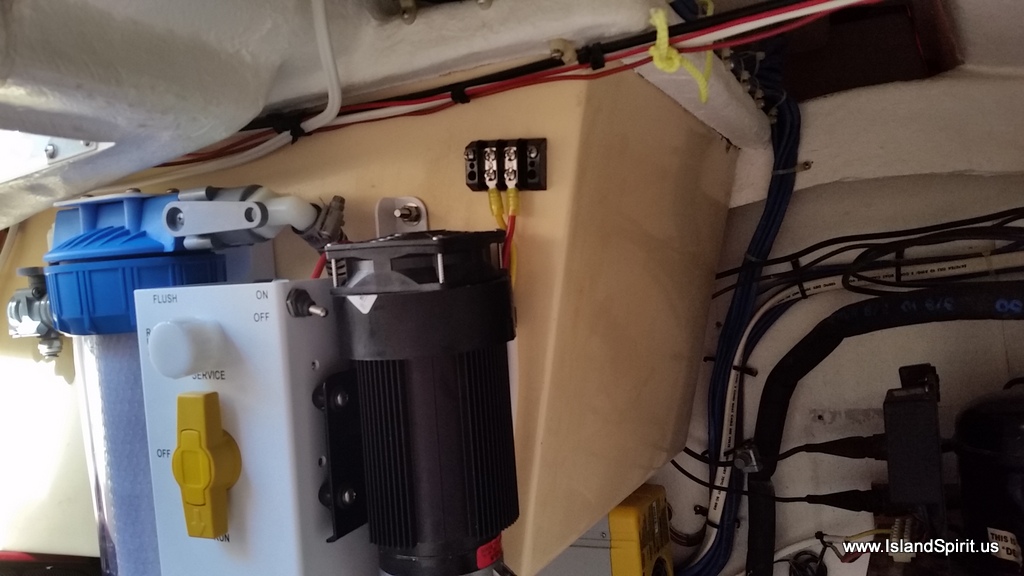
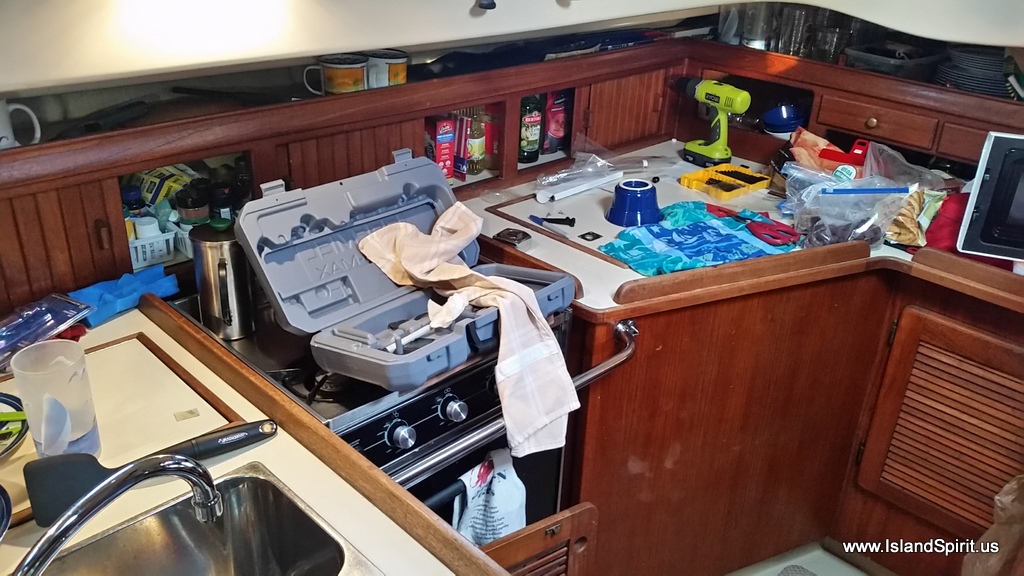
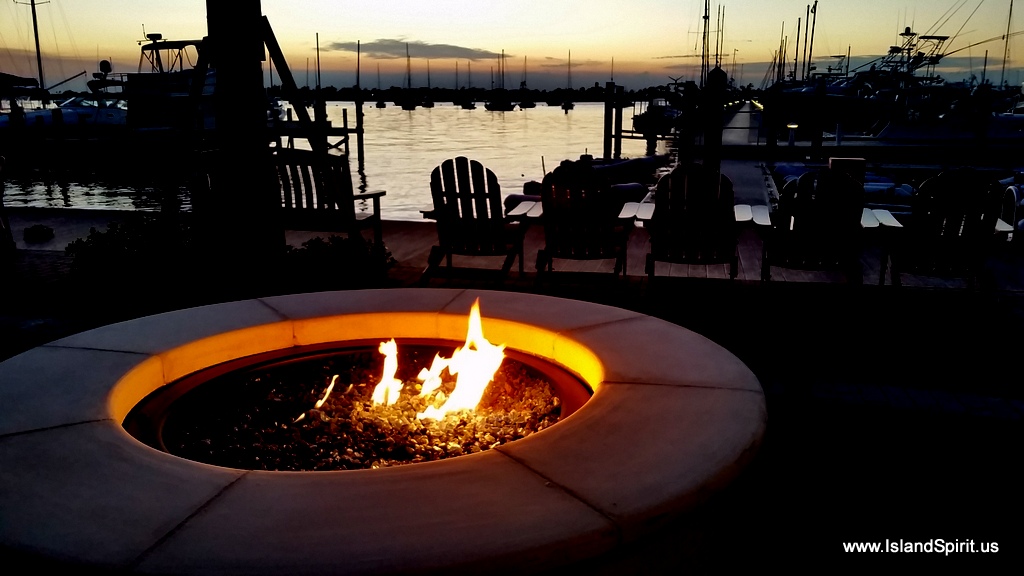
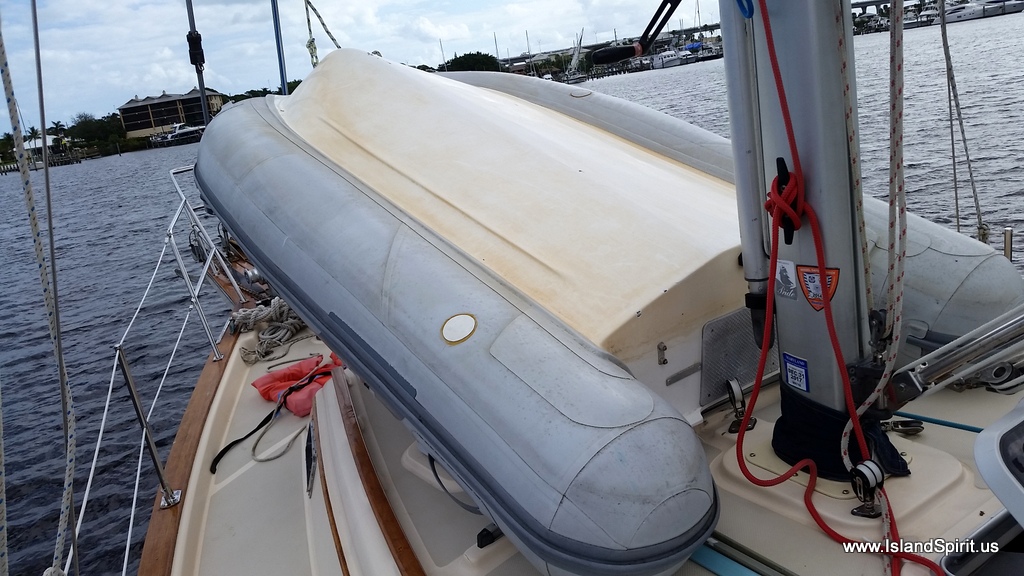
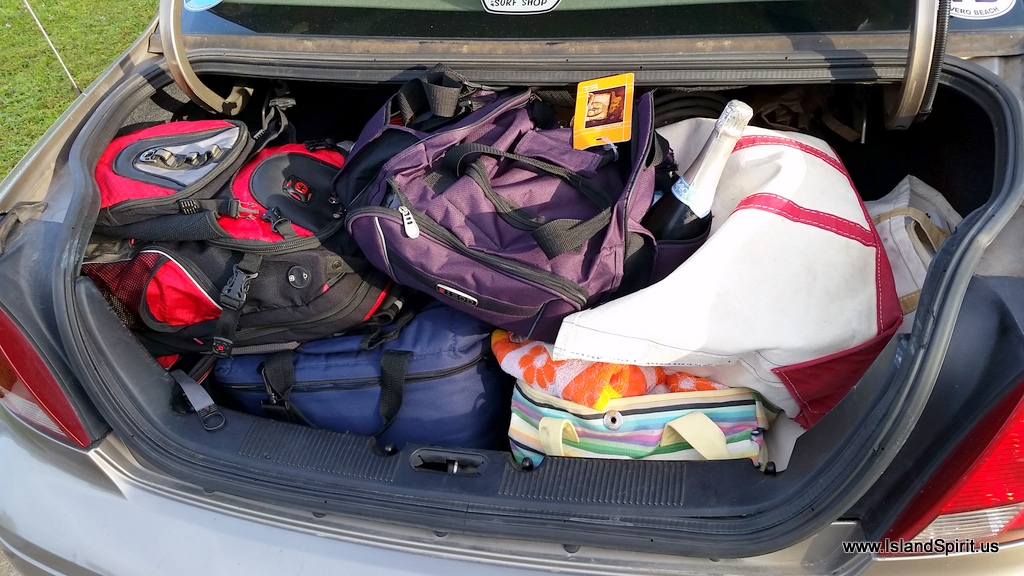
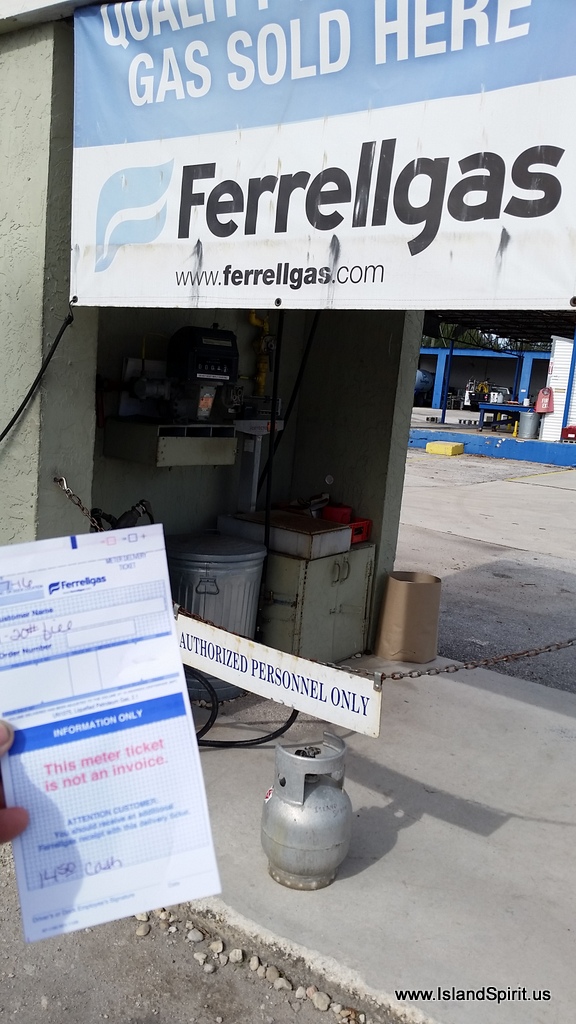
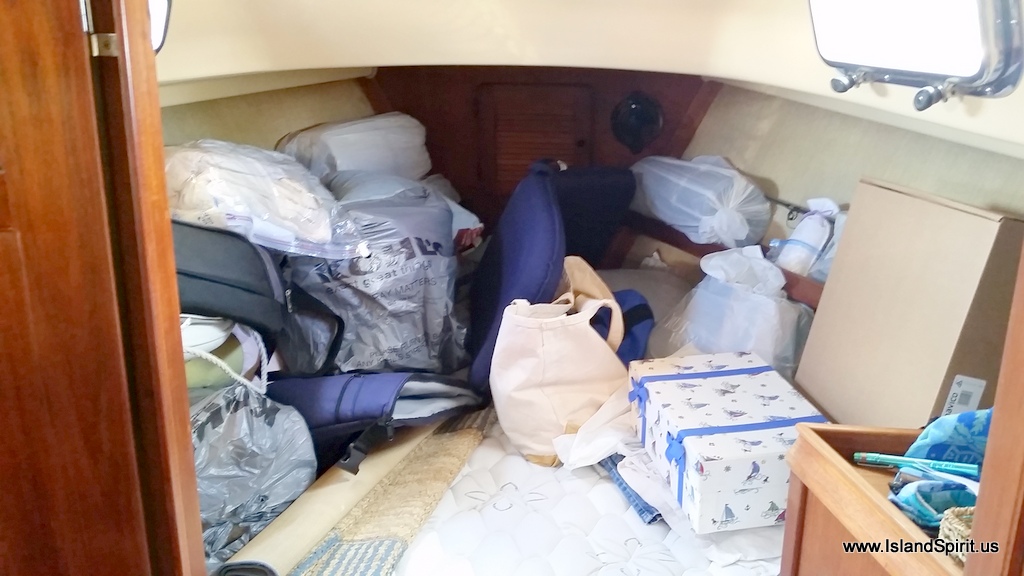
Below decks, we still have lots of work to do. We need to fire up the refrigerator.  We need to move our bags onboard and set up home. We need to set up the network, WiFi, the Router, Printer/Scanner and the Internet. One challenge we may have is the fact that Hinckley may not have a dock for us to move into once we launch. We are supposed to have a dock for two days after launch. This would allow us to wash the decks and to load our bags, food, sewing machine and clothes, plus water, propane and dinghy gas! Knowing we may be launched and then must drive off into the sunset, we are trying to figure out how this will all work. We will move 3 hours around to the other side of the harbor at Sunset Bay Marina where we will take a mooring ball to continue our refit #3. We are really hoping that we can move to a Hinckley dock to load up and clean up before we motor out.

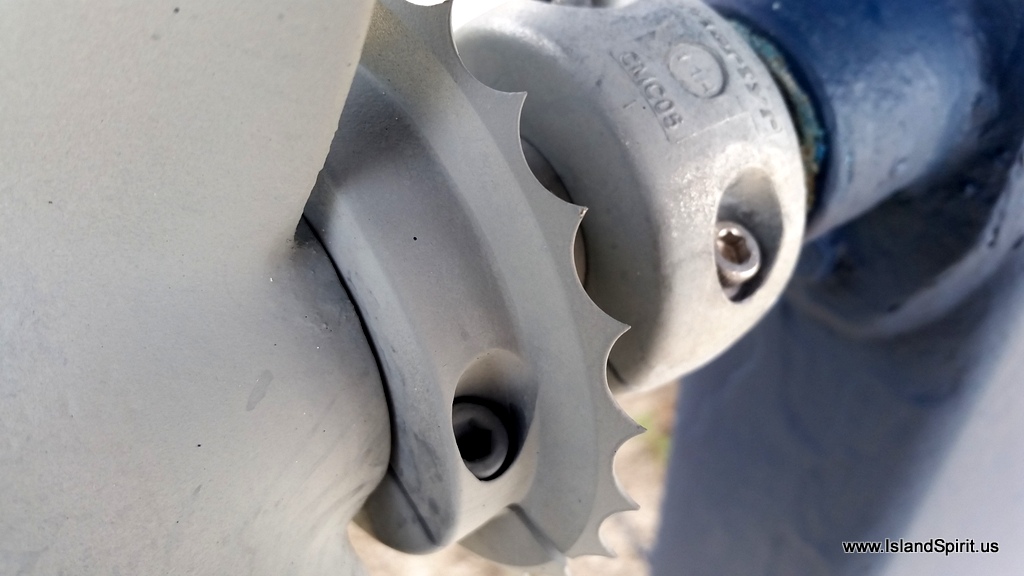
Line cutter added to propeller

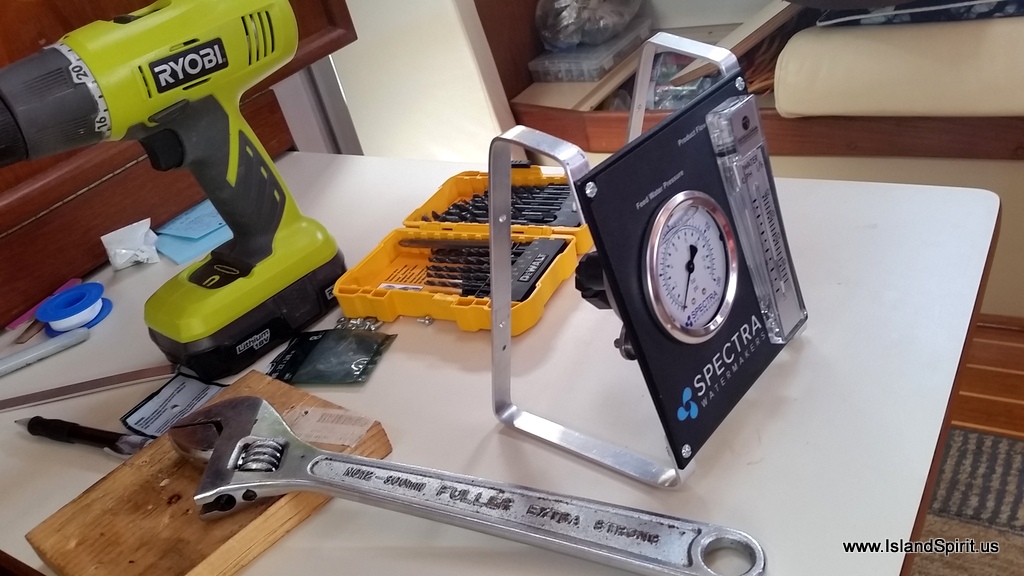
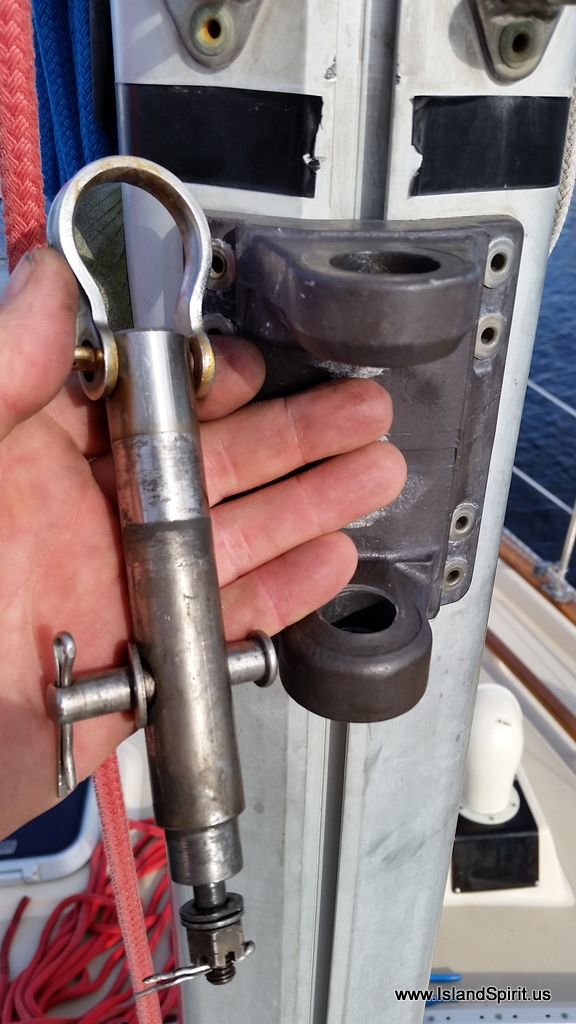
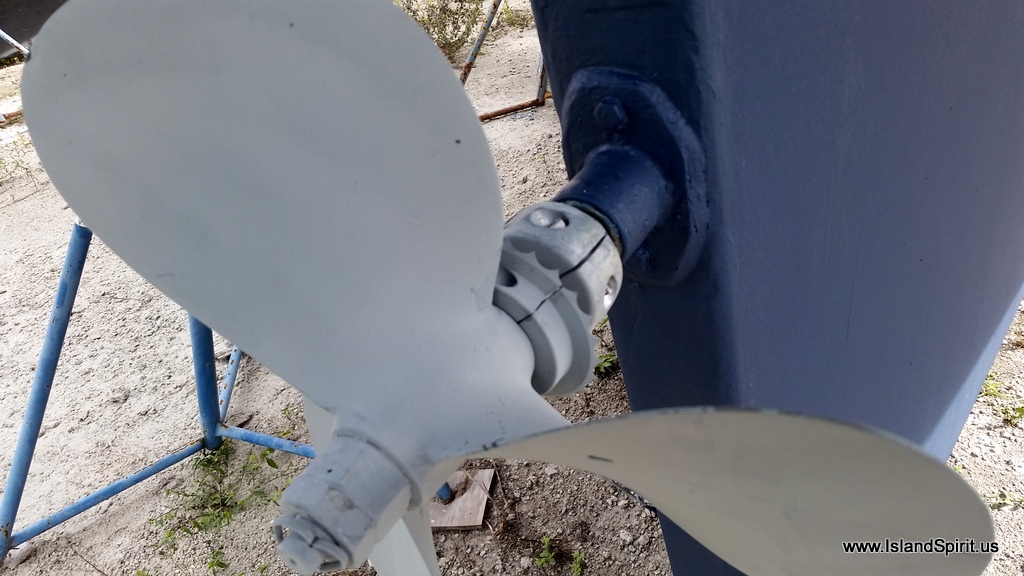
Over the past couple of days, since out NMEA 2000 network has been installed and connected, we focused on finishing up that install and then re-stowing all the gear back into the sail locker. We used up the left over quart of Petit Trinidad paint which is very expensive and we could not let it go, so we rolled on a second coat around the waterline, like we always do. We also added a line cutter called a Shaft Shark to the propeller shaft. This device is meant to cut off any lines that wrap around the propeller.

Repacking the propeller shaft…errrrrrr

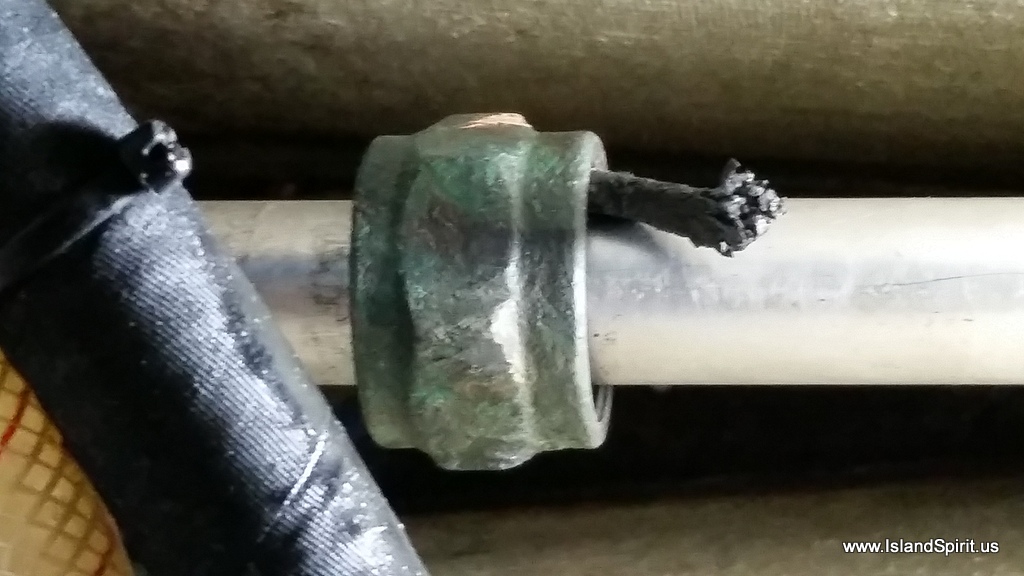
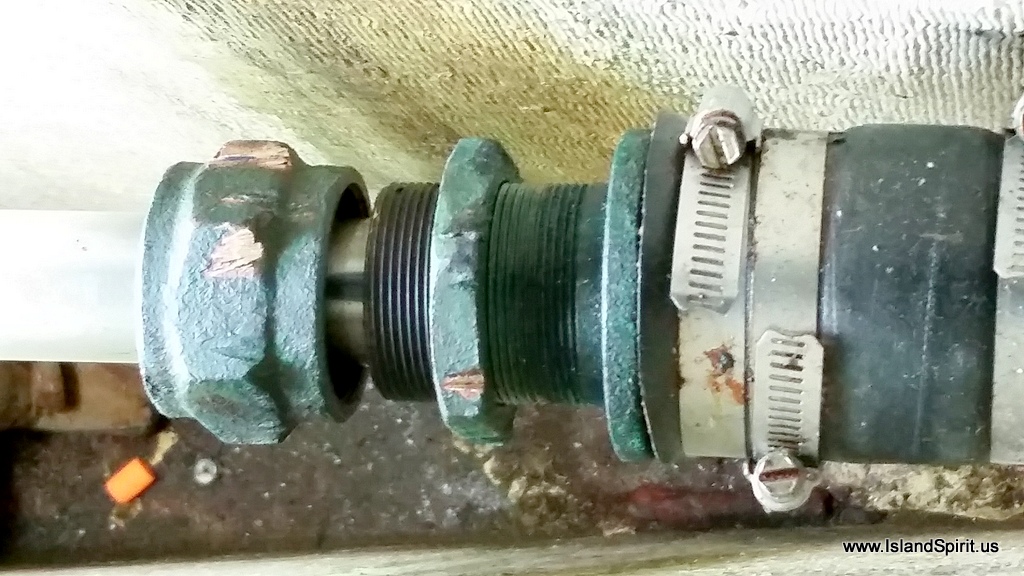
The final job was to repack the “stuffing box” which is really a cap nut around the propeller shaft. This cap nut is hollow and needs to be filled with a packing material. When this cap nut is threaded down against the fixed stern tube, it makes a water tight seal between the boat bilge and the spinning propeller shaft. This job requires you to loosen the cap nut, then, using dental picks, extract the old packing material, clean the area and then install new packing material. This all takes about 1-2 hours and it also brings out the most creative vocabulary due to the terrible working conditions. You need to be face down with your arms fully extended down into the bilge and there you work with tools and picks and wrenches repacking the “stuffing box!” What a pain in the butt. Next to rebuilding the head or sewer holding tank, THIS is one of the toughest jobs on a boat. We did it and it is finished.

So, we are as ready as we can be, we are in the middle of a full refit, but we will launch this boat Monday and we will be back onboard…..finally….

Here are some photos….

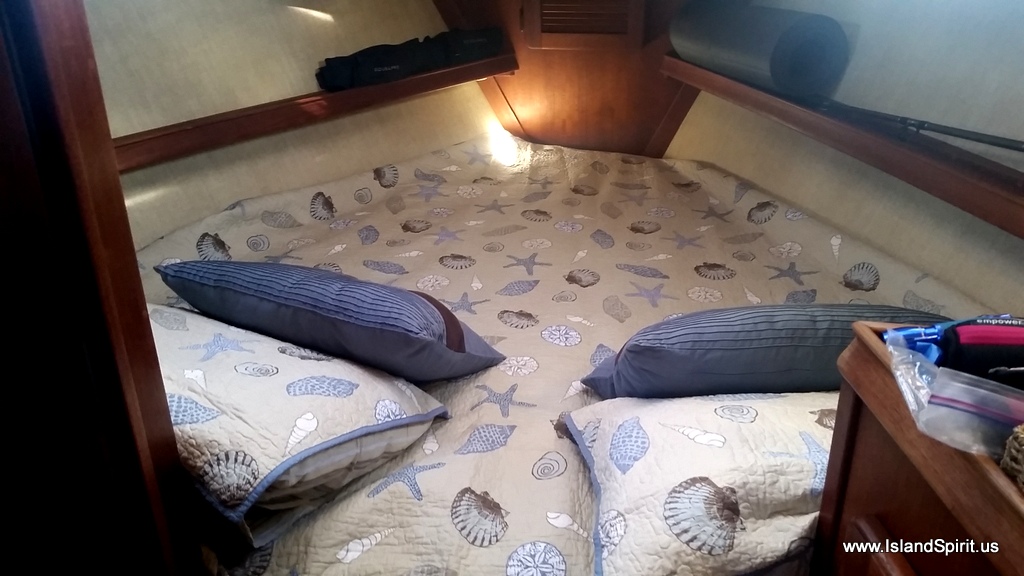
Our bed, yup, we still have some rearranging to do  here !!!


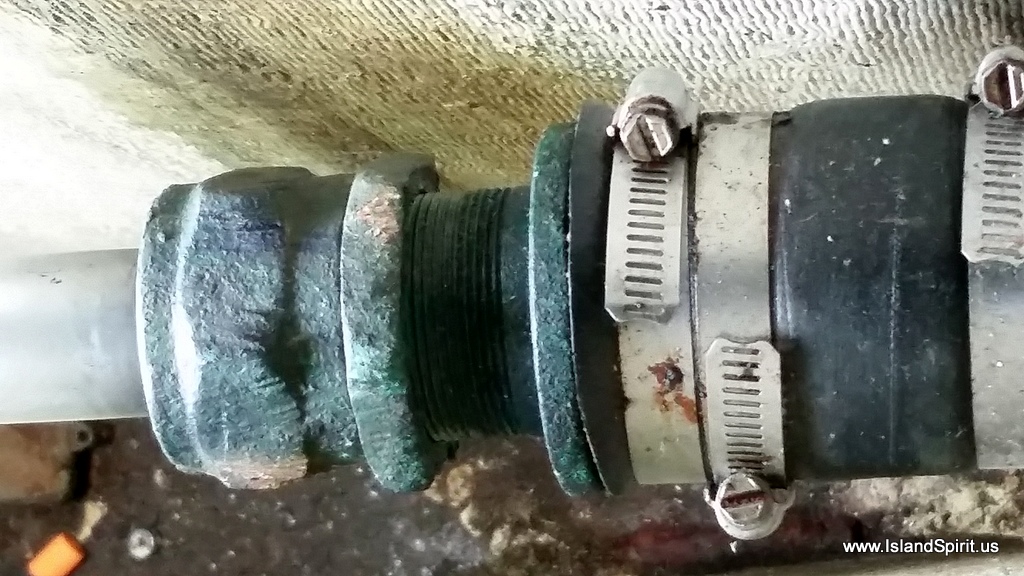
Repacking the Stuffing Box. This is how far the cap nut will thread up with two rings of GFO added.

This would be the third ring, if added it would allow only a few threads
So, we only used two rings of GFO Gore-Tex Packing

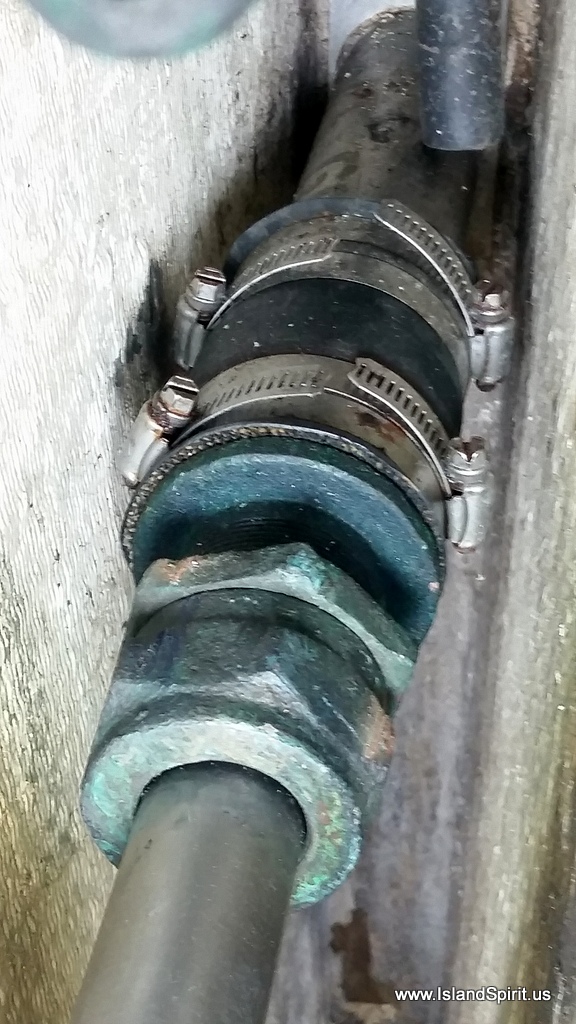
This is back together……this took over 3 hours of work.

This is the stuffing box. Cap nut, lock nut, rubber clamped seal, stern tube, hull

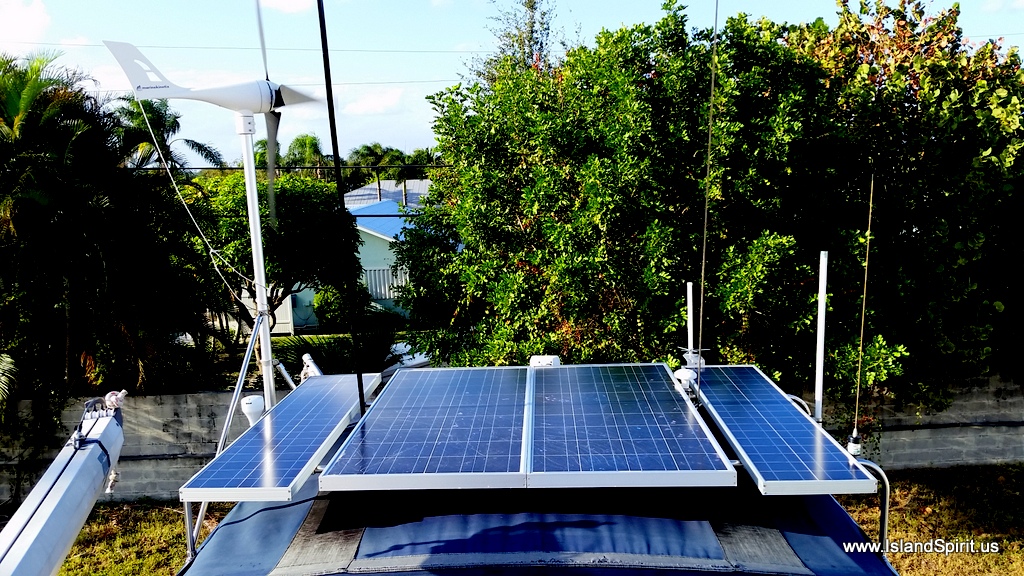
Our antenna farm: AIS, Sat Radio, 3G/4G Cell, Bullet with 12db gain

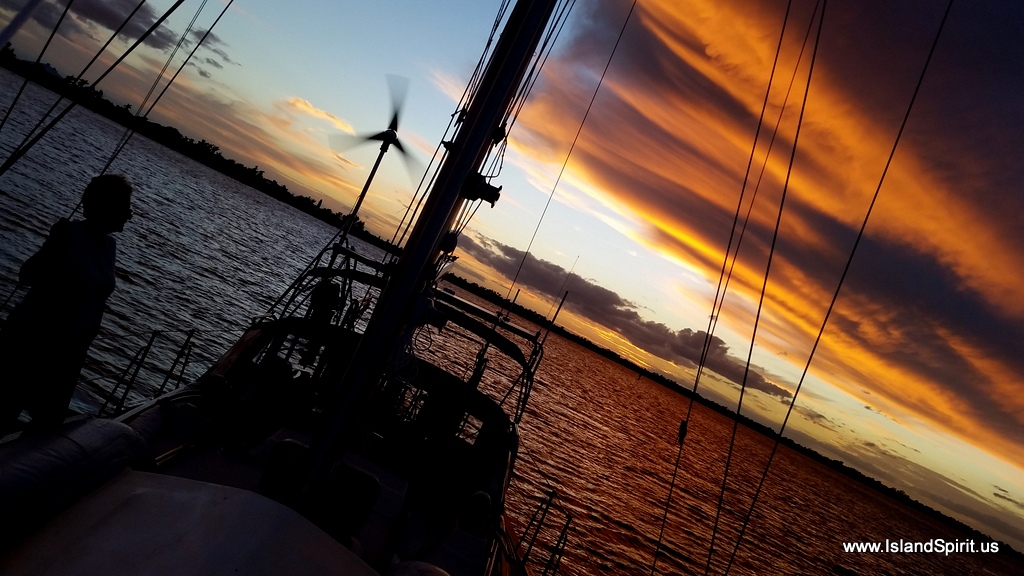
Solar roof and wind machine
350 watts of solar, 450 watts of wind, which gives us about 100 amp hrs/day

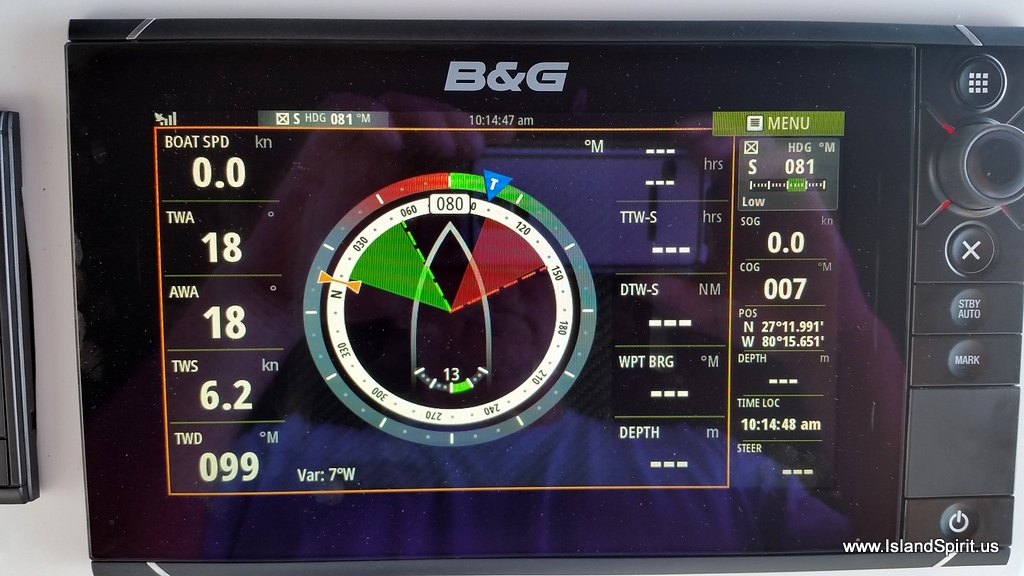
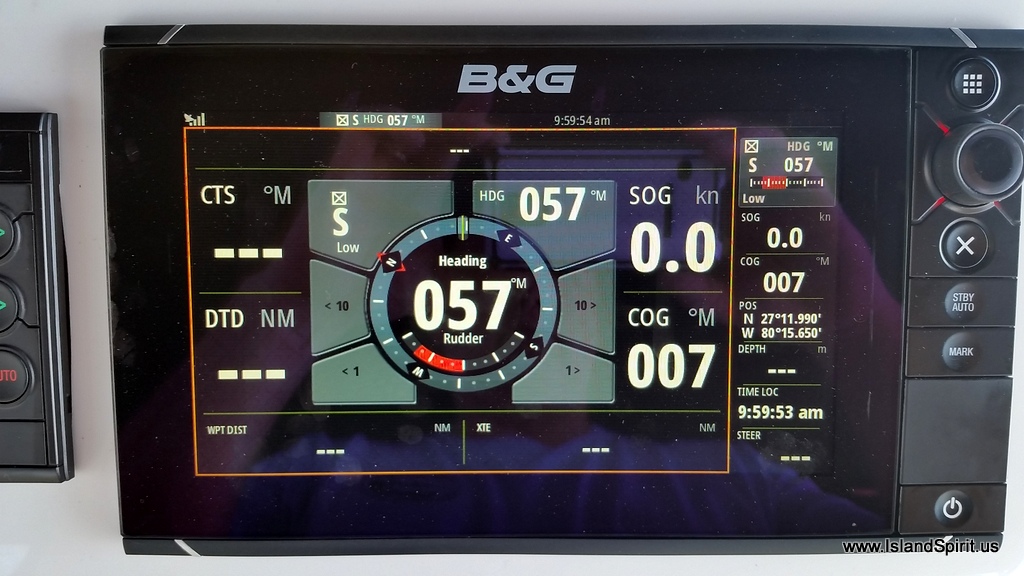
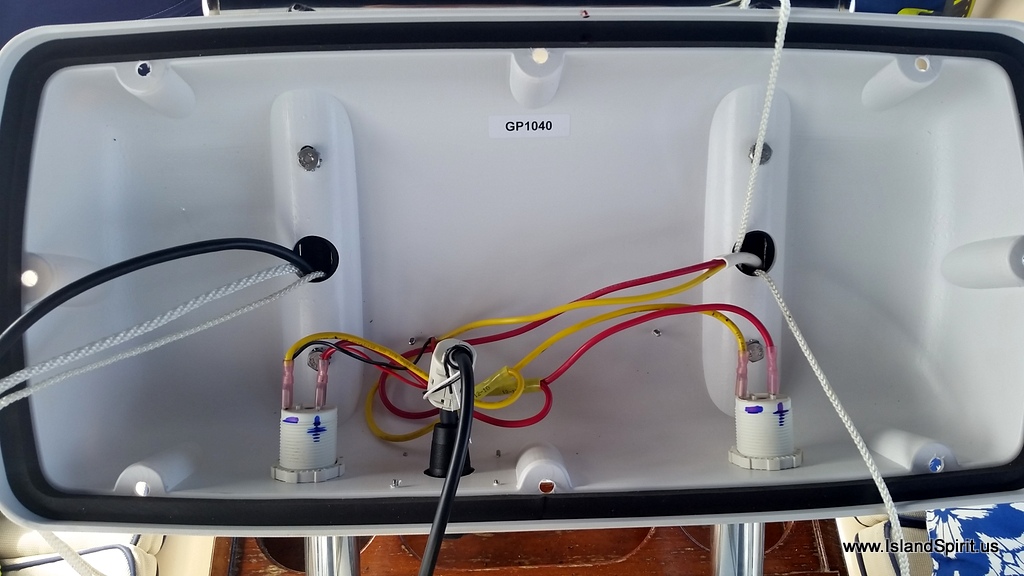
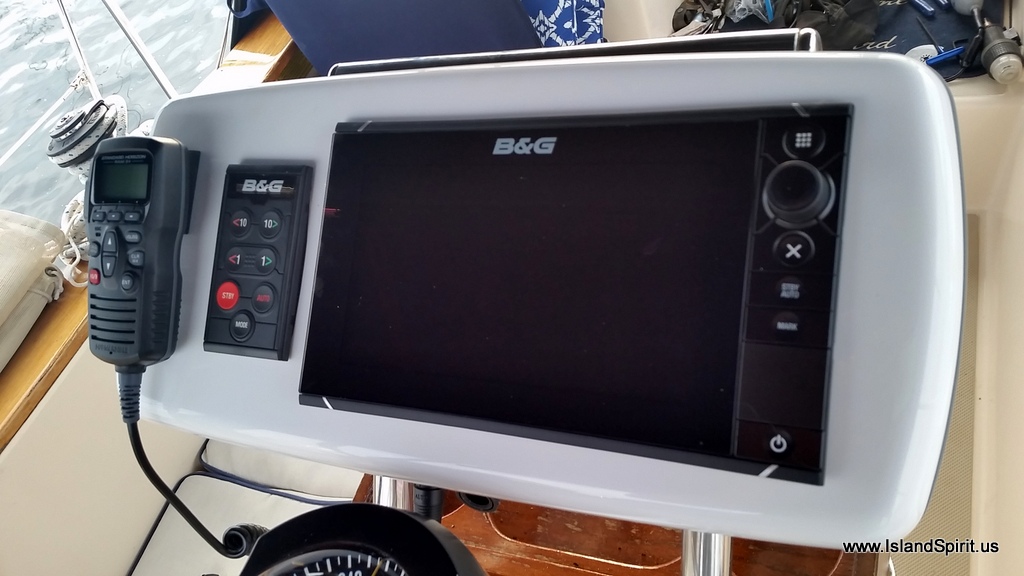
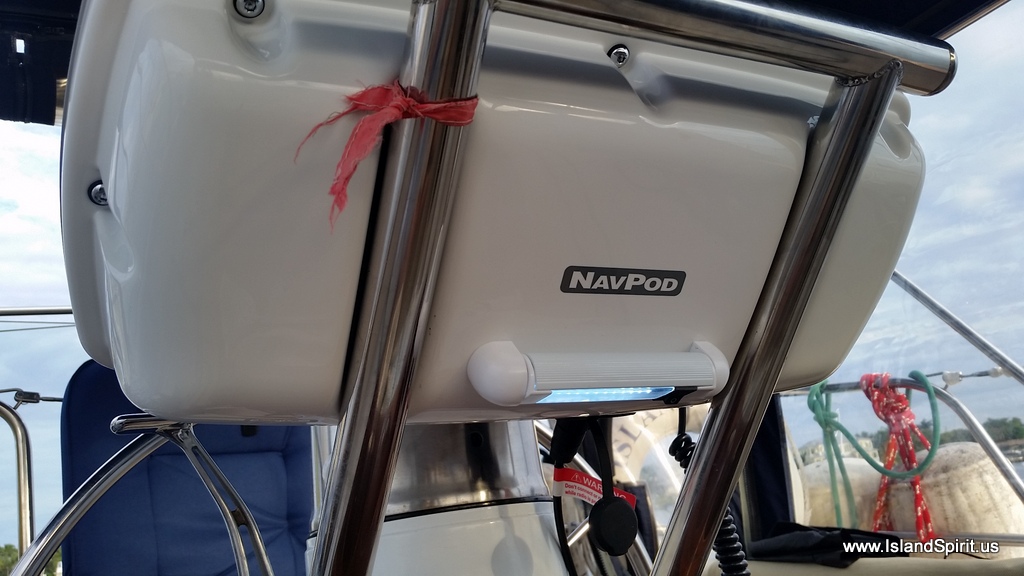
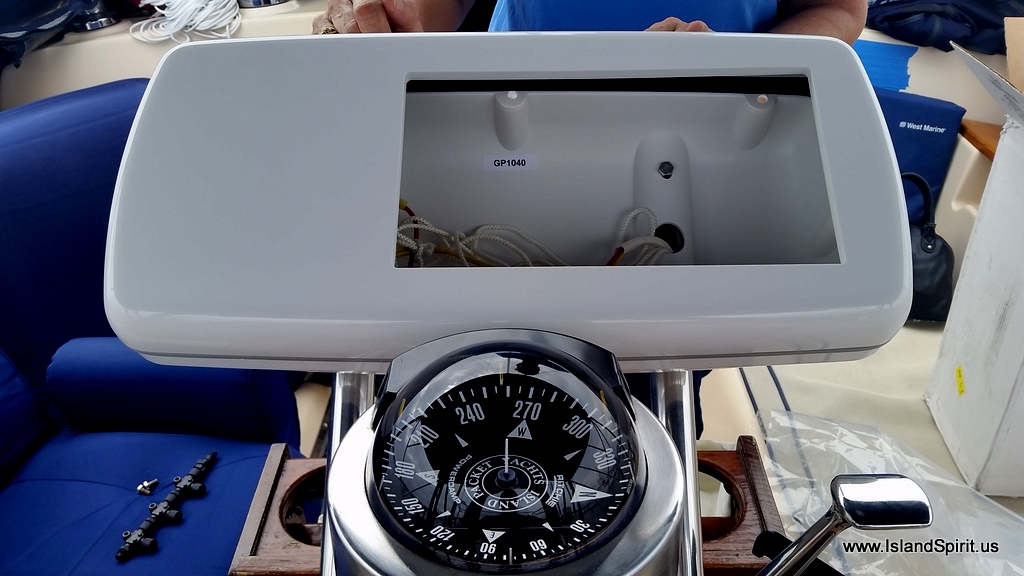
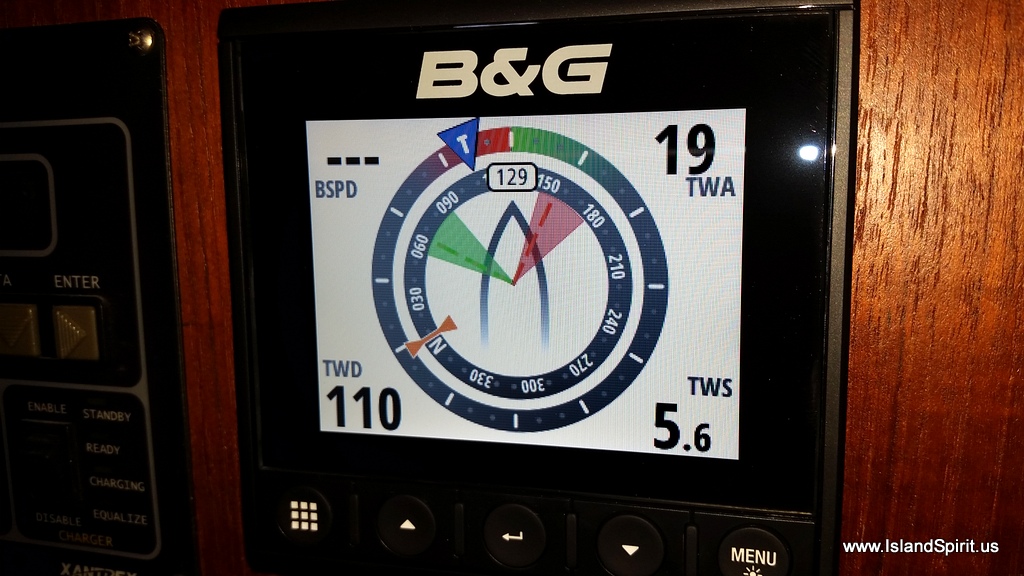
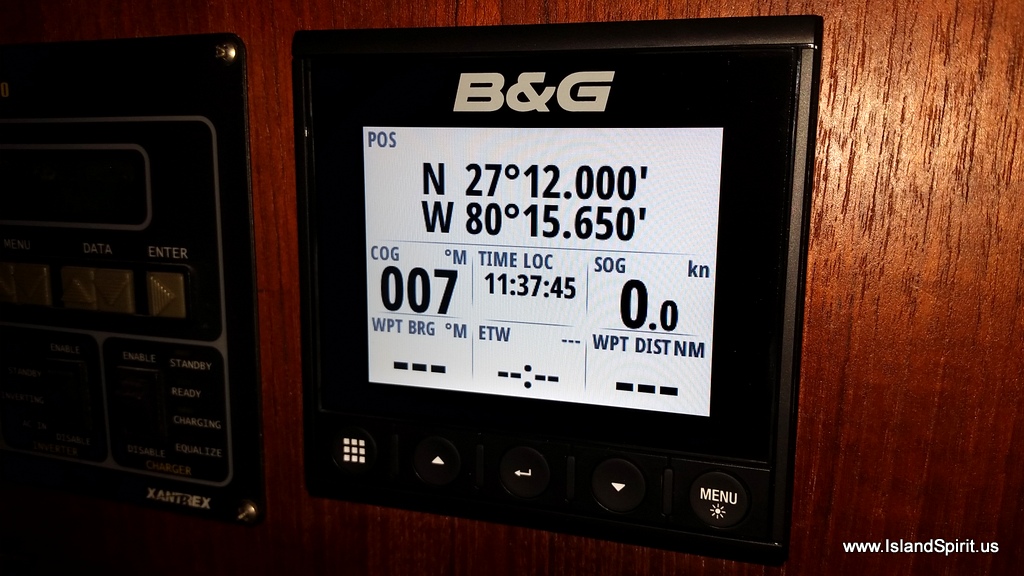
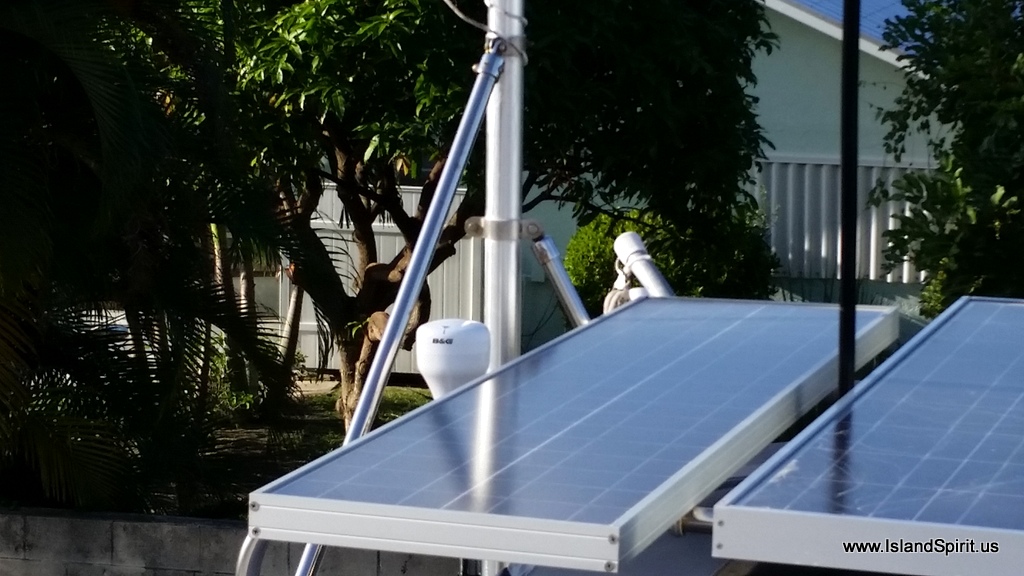
New B&G GPS just over the solar panels

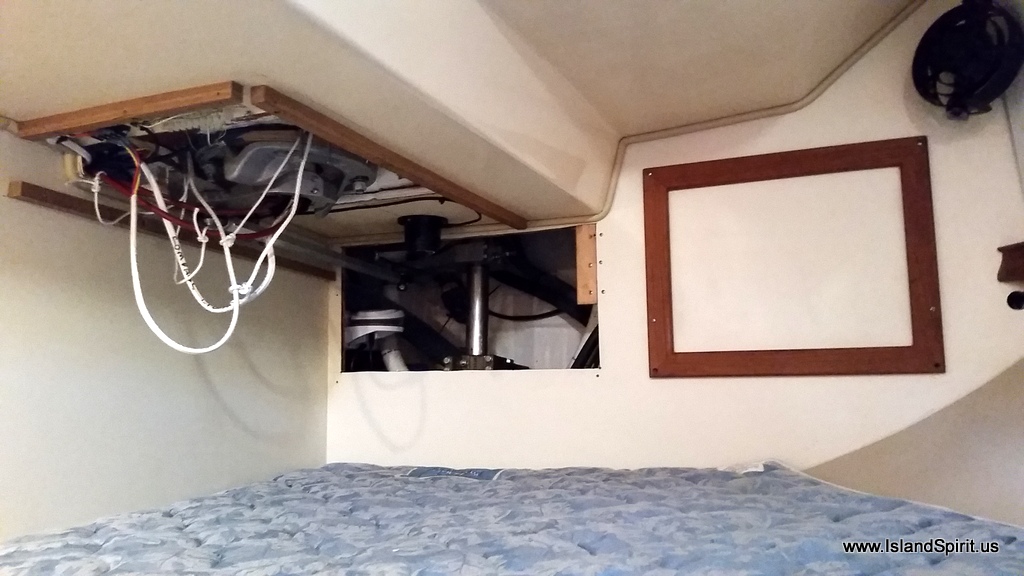
Our quarter berth rtern wall extra access cut out. It helps with all this work.

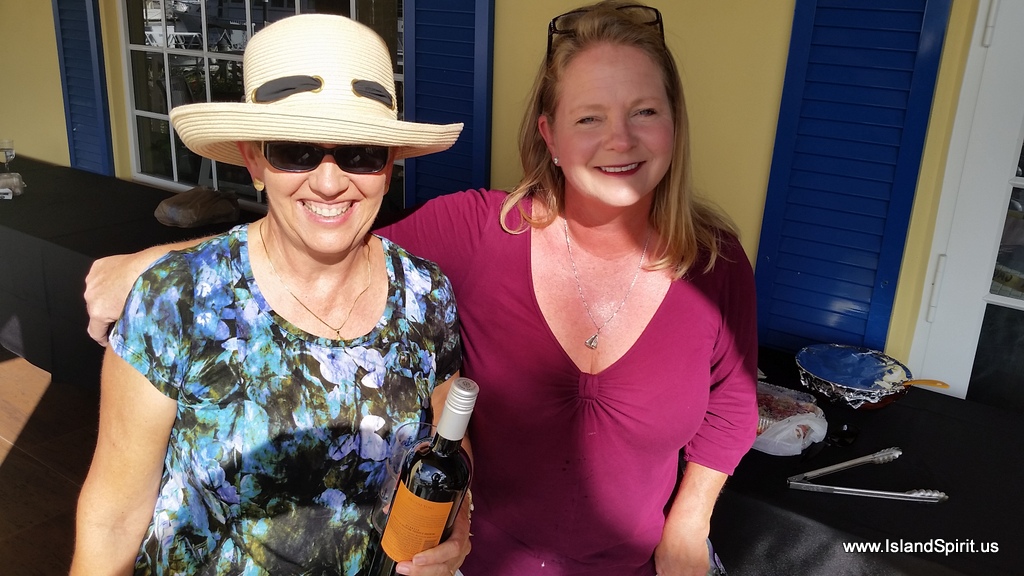
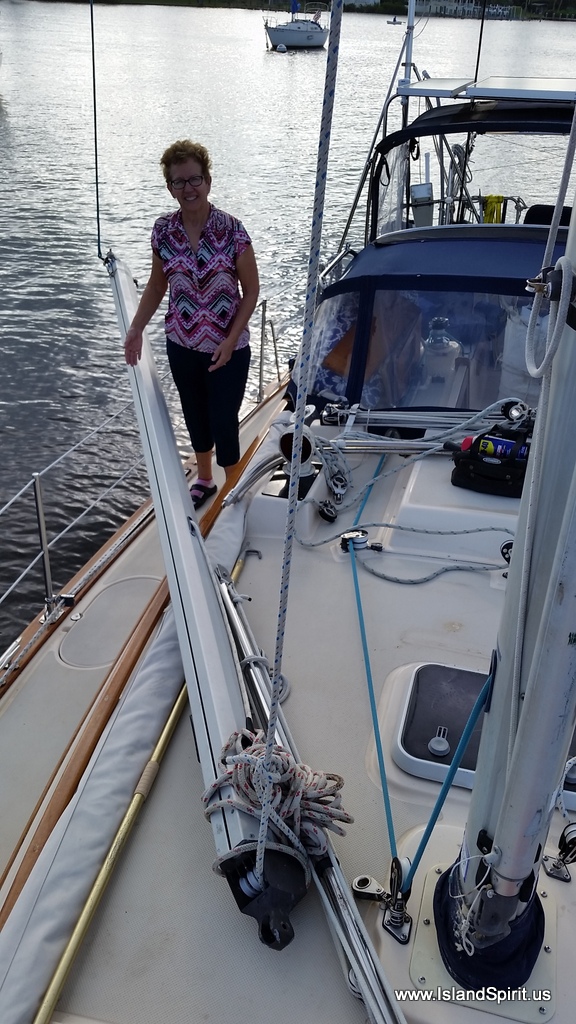
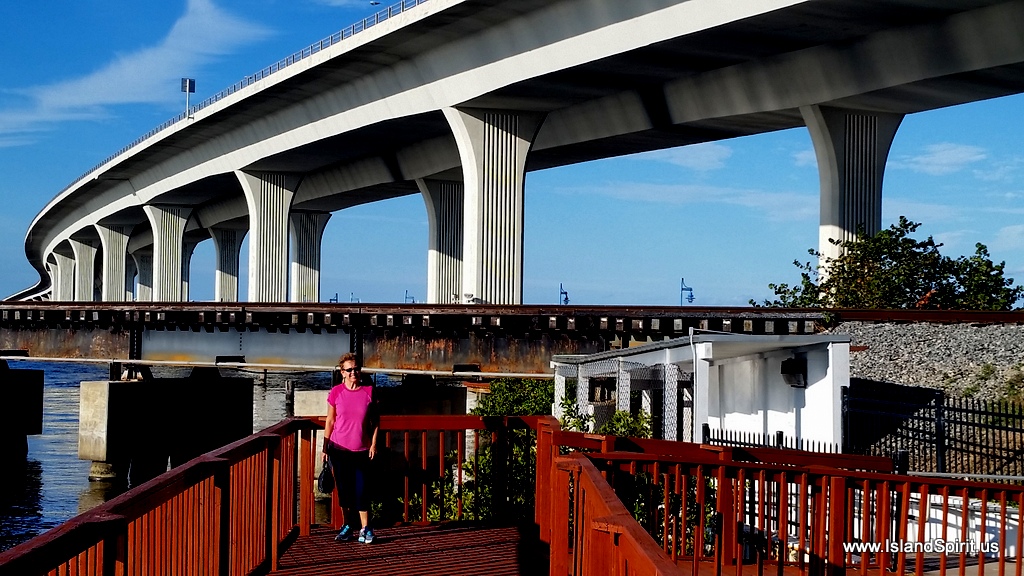
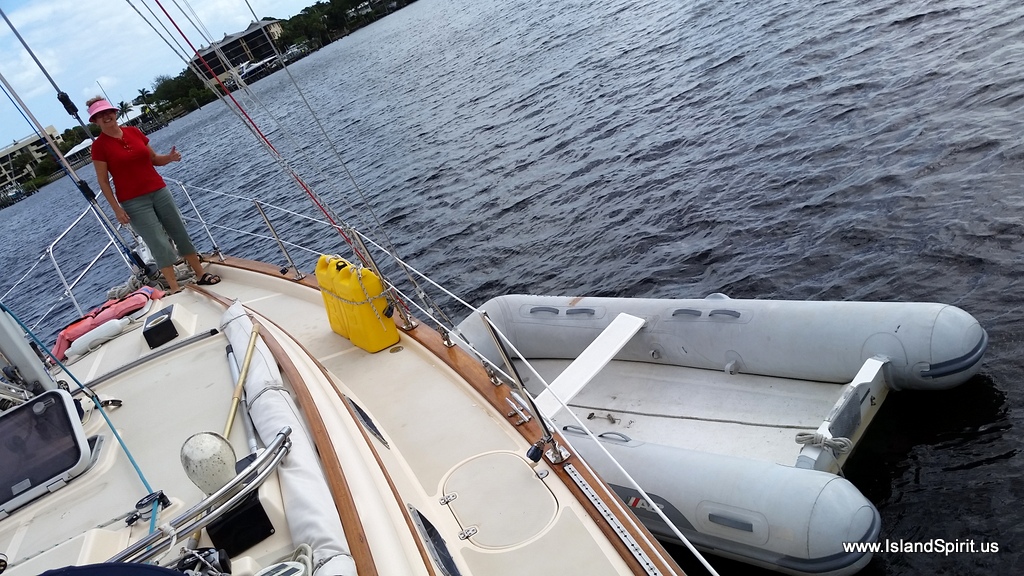
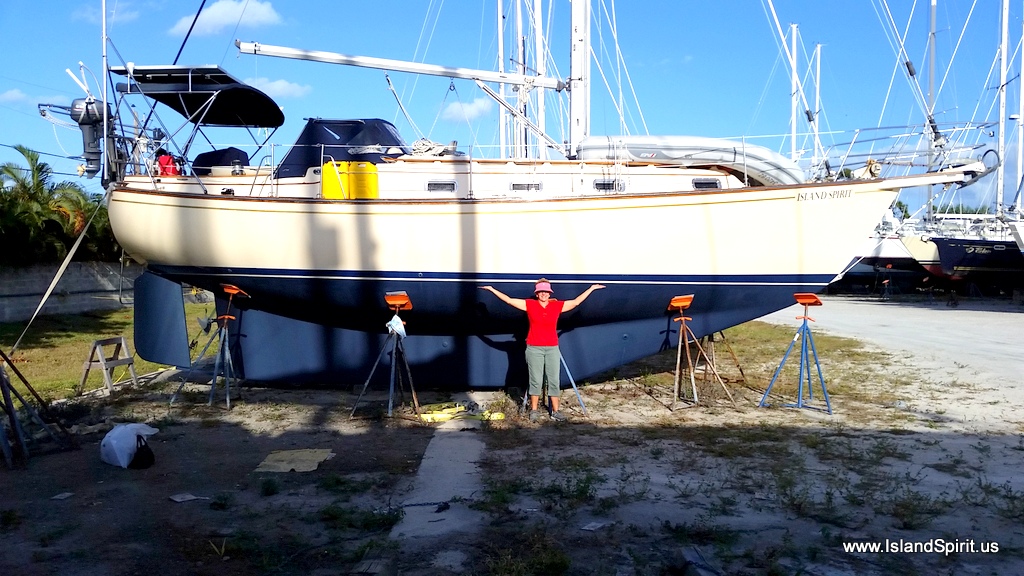
Radeen, poses at the beam of Island Spirit

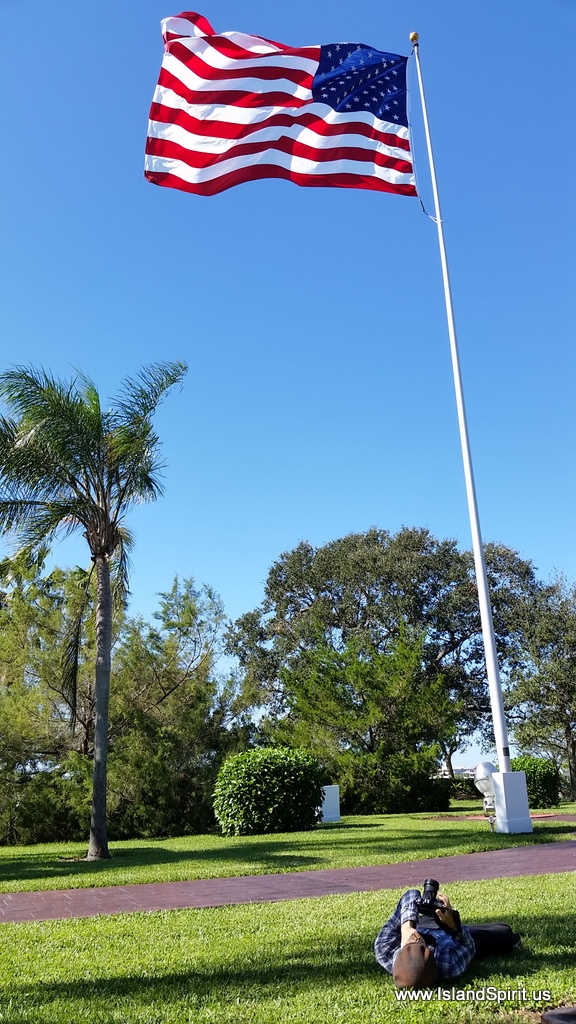
Looking EAST, towards the Bahamas.

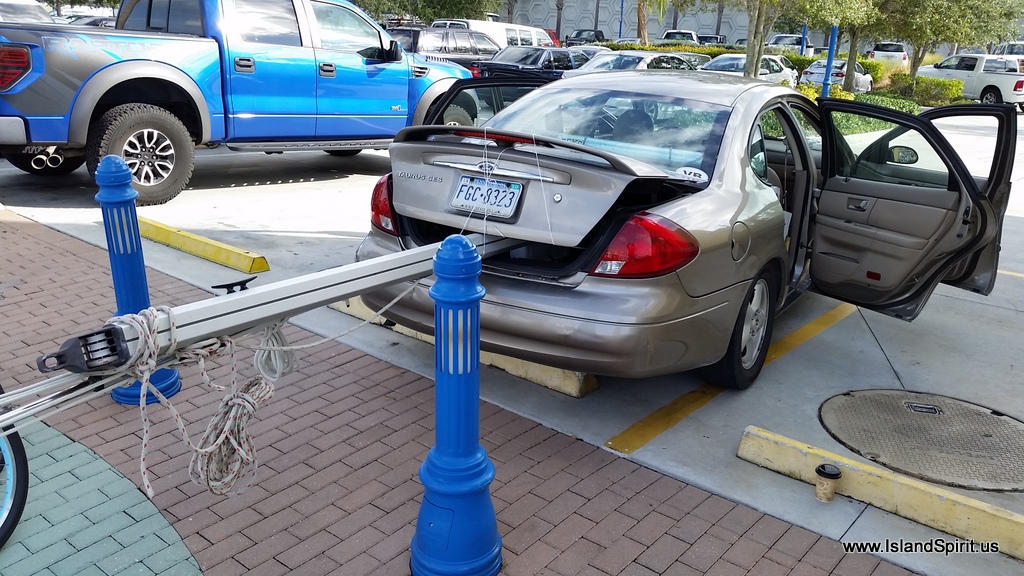
Radeen with “Goldie” 2our 003 Taurus with our Vero Beach sticker

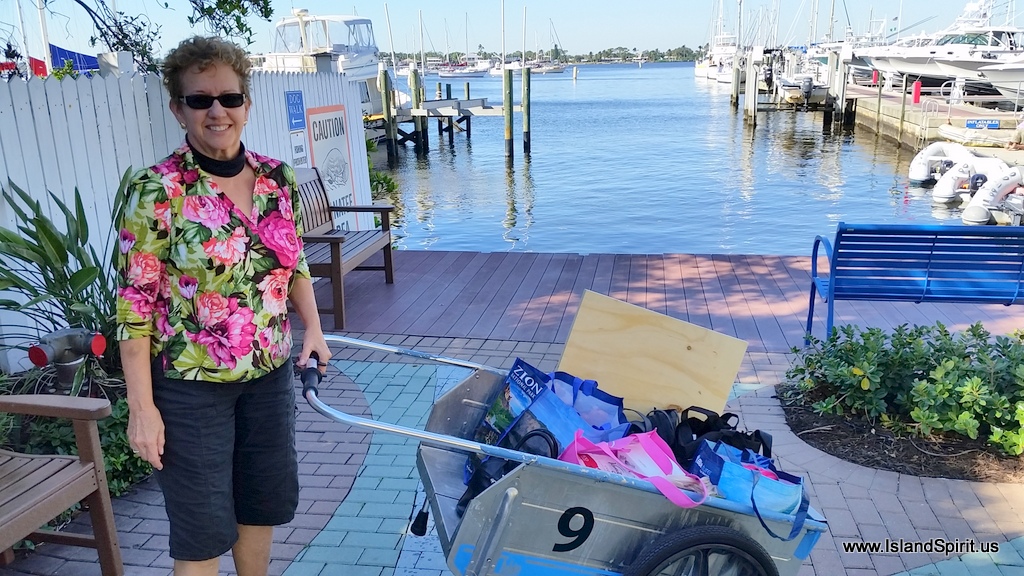
Every day we go to Home Depot, errrrrr

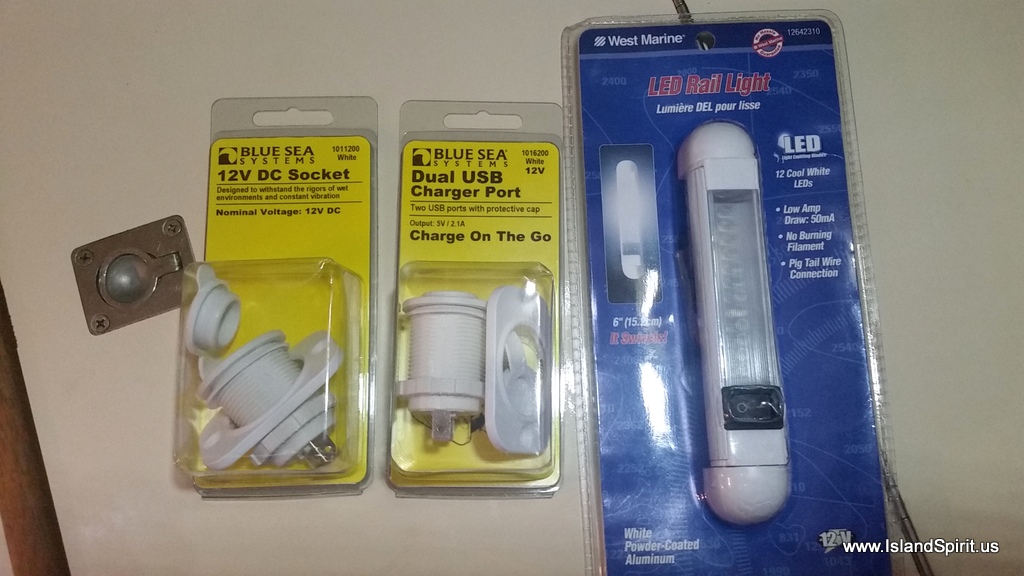
Every day we go to West Marine $$$$$$

Our prop with fresh Petit Prop Paint and the new Shaft Shark line cutter

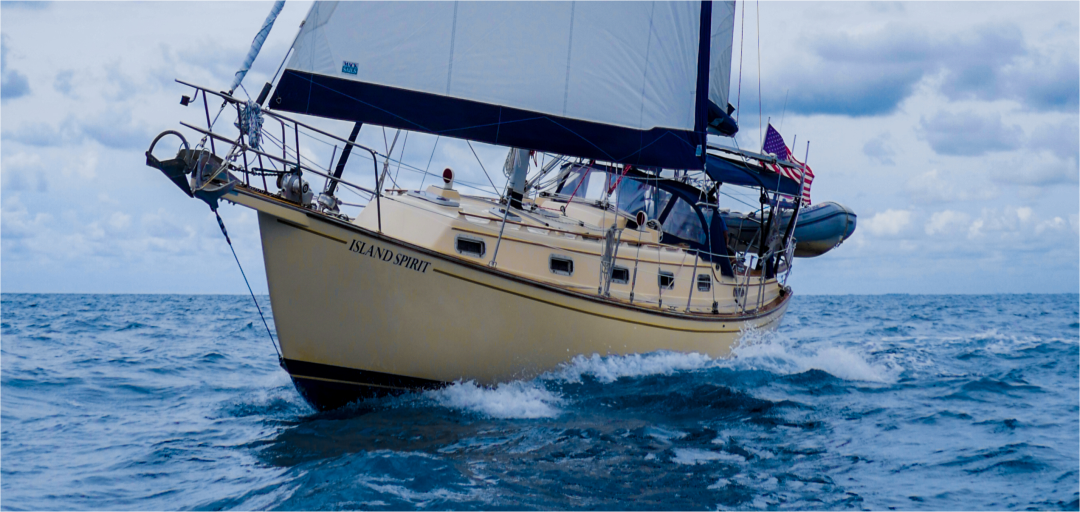
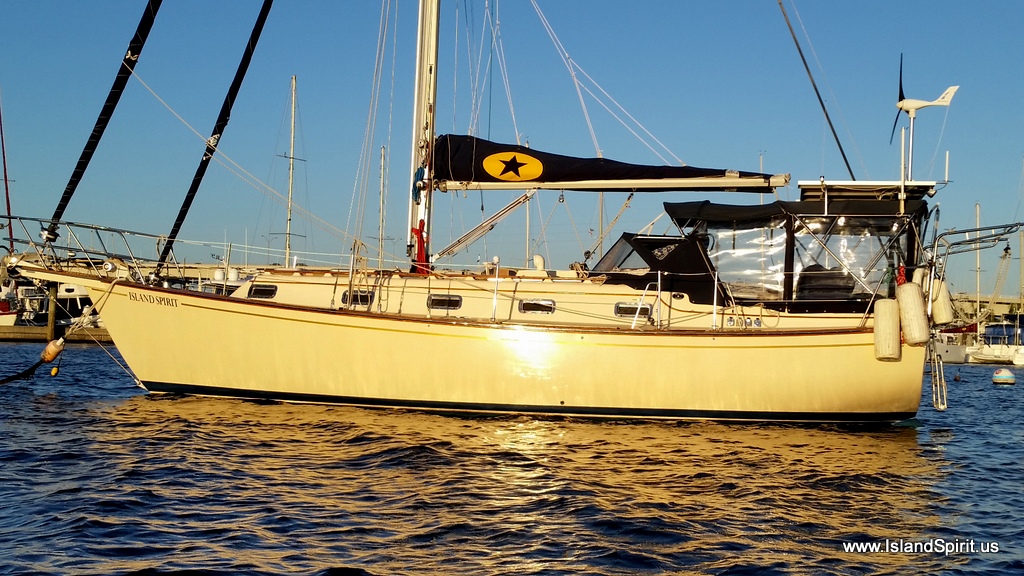
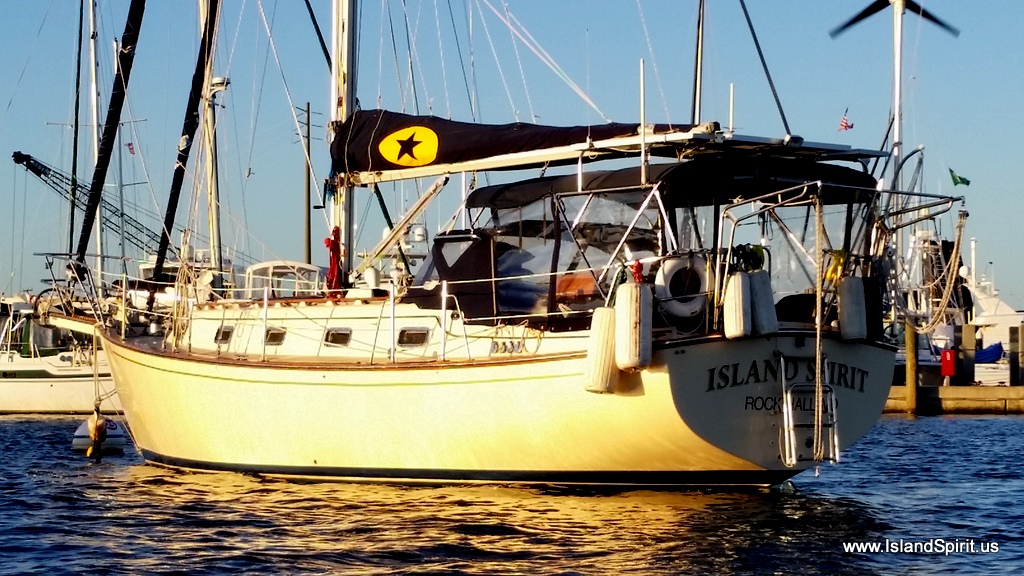
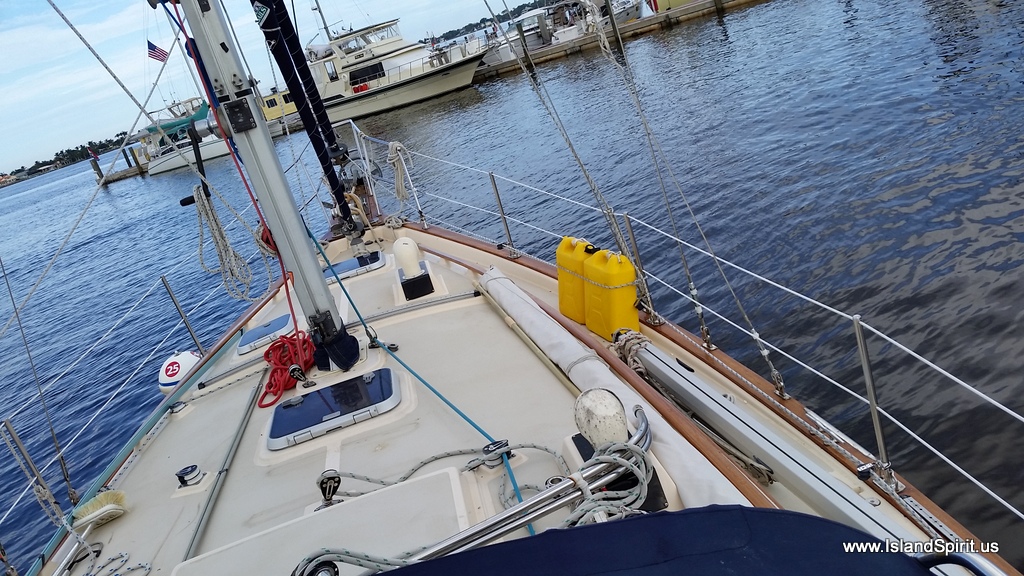
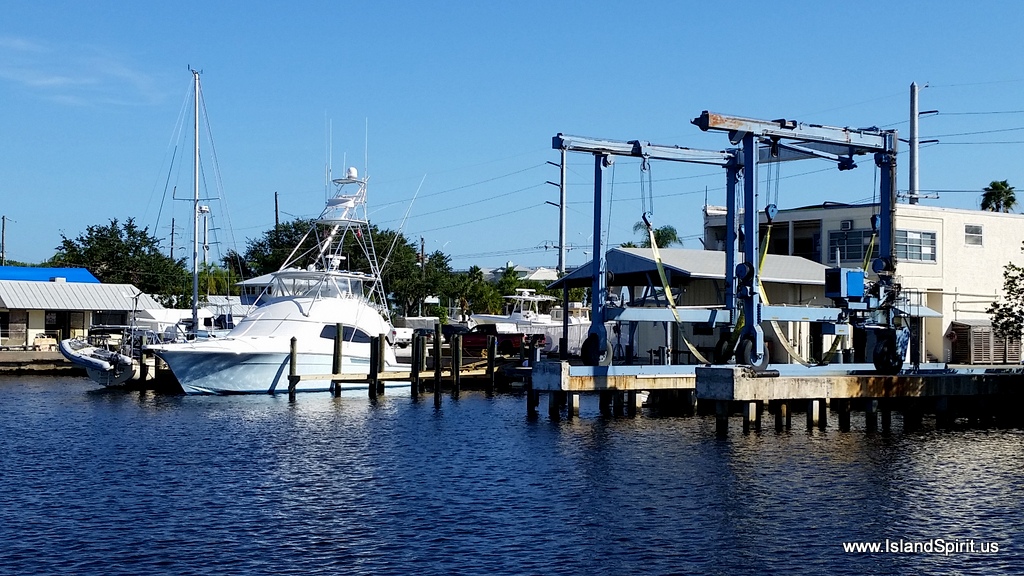
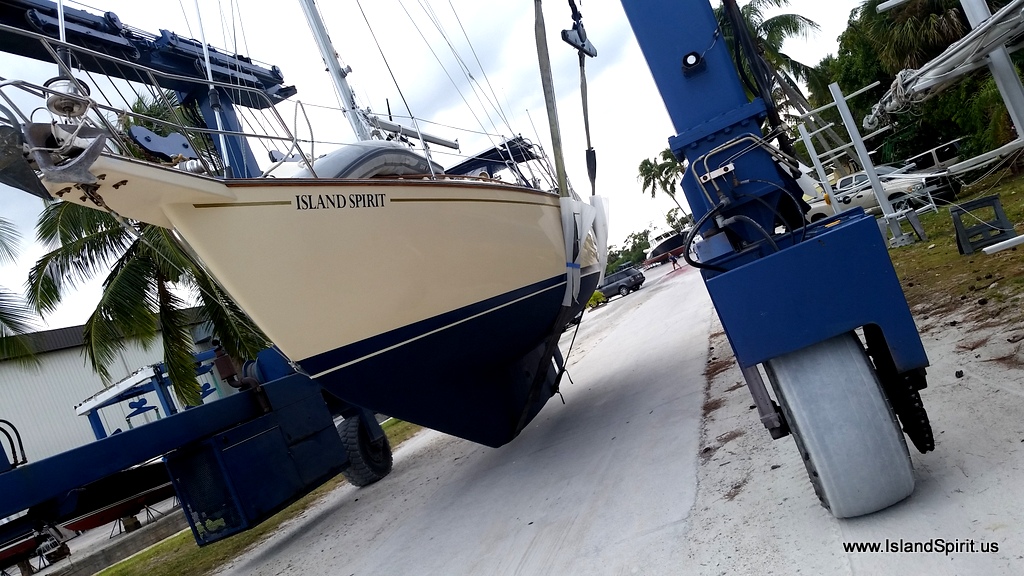
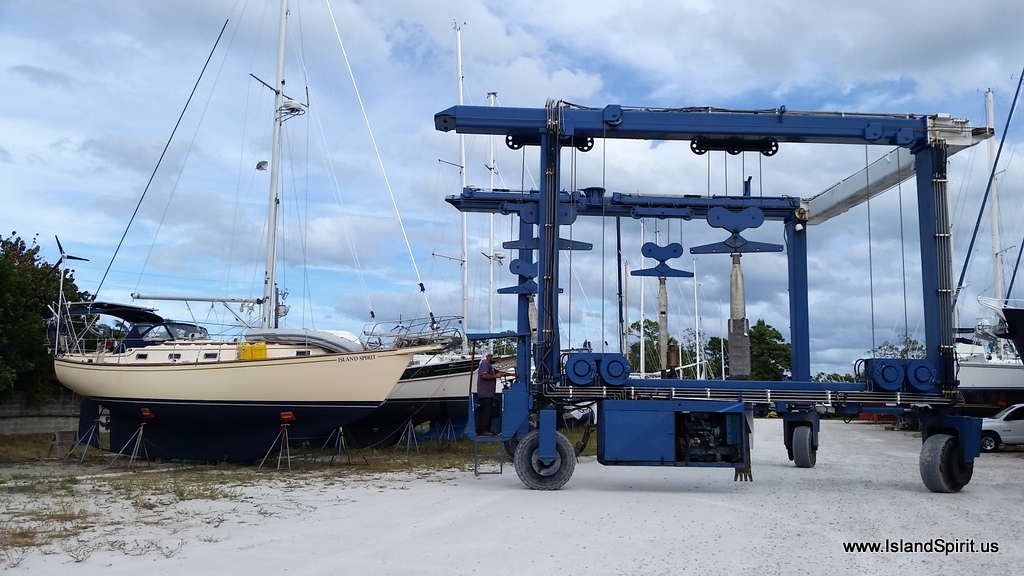
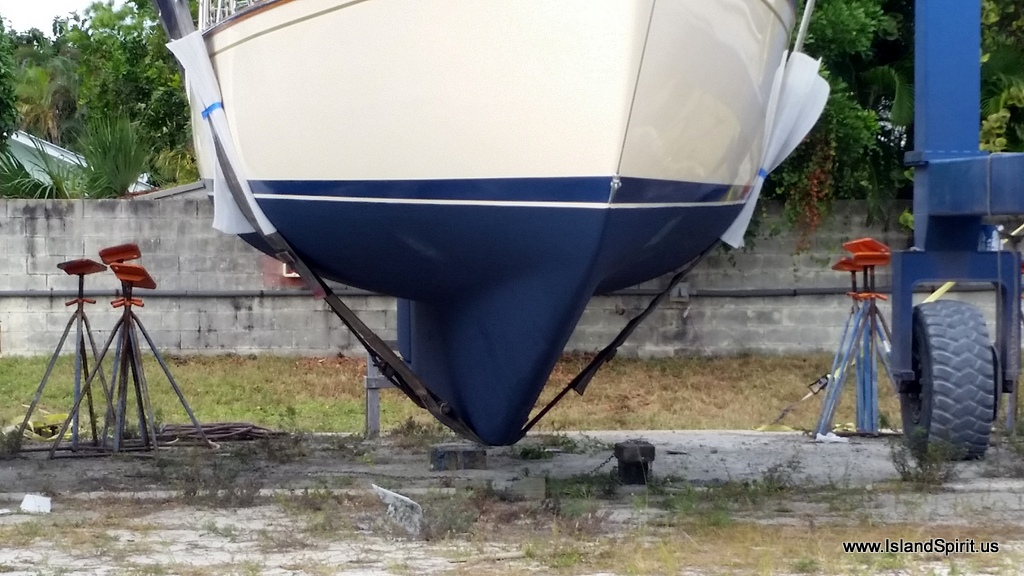
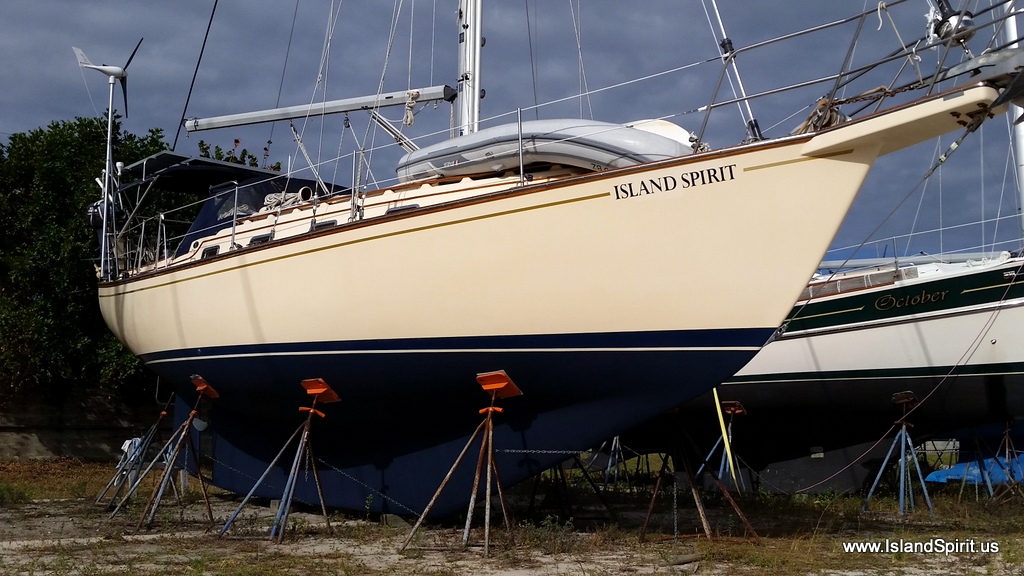
Our beautiful Island Packet 35, Island Spirit
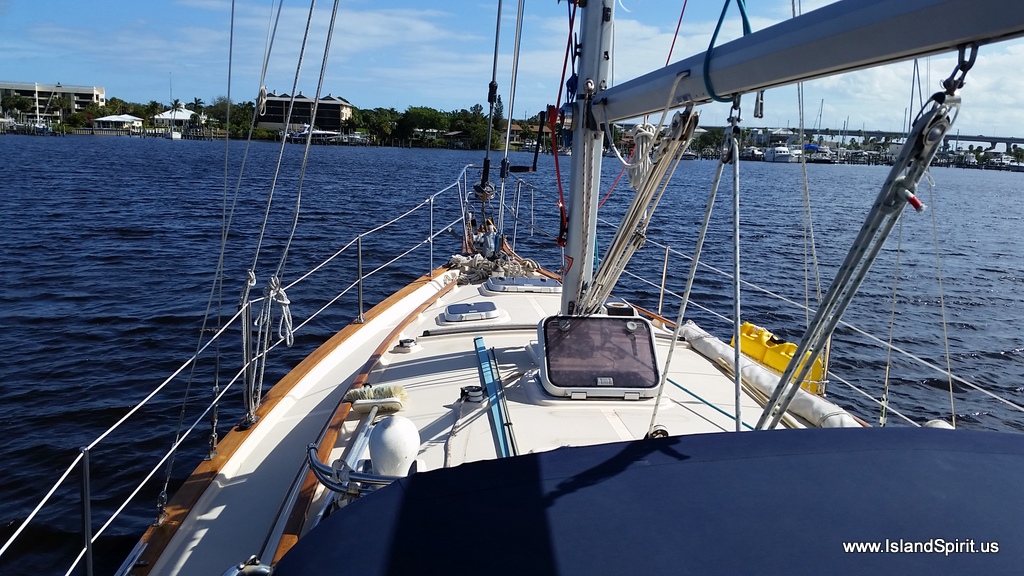
She is ready to go

Our 8,000 lb full keel, this keeps the boat upright at sea

Hayden’s selfie at the bow of Island Spirit

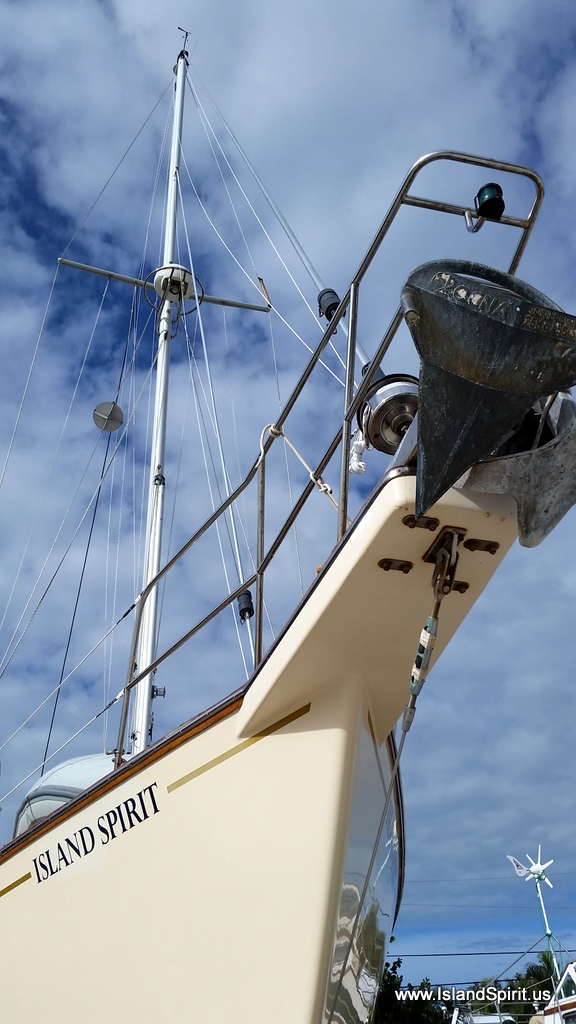
Looking from the bow up past the anchors to the 50 foot mast, always interesting

Island Spirit is READY, she will take us to the Caribbean

We are excited, we know we have more work to do, but we are living a lifetime dream and we recognize this. We fully appreciate our ability to be living this cruising life. We are on the launch pad for a new adventure and we are excited with our goal of sailing beyond the Bahamas and sailing onto the Caribbean. Thank you for sailing along.